Dimension Shots
Where to access the tool
The Dimension Shot tool can be accessed from the navigation menu within the Cylindo platform. Once you have clicked on the associated menu option, you will be redirected to a list of all of your products. You can then filter this list by products with or without existing dimension shots.
If a product already has one or more dimension shots, you can simply click on the product to see the ones that have already been created.
Create or add a dimension shot
To create a dimension shot, click on the “Add shot” button on the left panel. You will then be able to select from 32 different frame options available for the product selected. Then, use your cursor to click and draw a line to represent your dimension on top of the frame displayed in the editing area on the left-hand side.
By pressing and holding the ‘Shift’ key you are able to easily draw horizontal and vertical lines. You can amend the line length and direction by clicking and dragging the start or end points.
Once you’ve drawn your line, a preview will appear on the right with a label above it showing the value “0” followed by your default unit. Make sure the correct line is selected and then you can update the value within the right-hand panel under the “Label” dropdown.
The label will automatically update its position to match the center of the line, but you may adjust the label’s position along the X or Y axis by entering the coordinates into the “Label placement” section.
Creating and using dynamic dimension shots
Dynamic shots are handy to use if you’re creating dimension shots for multiple configurations of the same product that share the same dimensions. When using them, you can copy over the dimensions from one configuration onto all others without needing to draw them separately for each other version.
To create a dynamic shot, go through the same process explained in the previous paragraph, only when clicking “Add shot” choose “Add dynamic shot” and then draw the lines as needs be.
Once the lines have been drawn and saved, we can begin the process of copying them over to the other configurations for instant usage. To do this, follow the steps below:
Open the Copy menu: Click the three-dot menu (...) on the shot you just saved and select Copy dimensions.
Select destination shots: A dialog will open listing all other available shots. Check the boxes for the ones you want to apply the copied dimensions.
Finalize the copy: Click Apply dimensions to trigger the batch update.
Review and fine-tune placement: Locate the shots in the left panel to verify that the dimensions have been successfully applied. You may need to manually fine-tune the dimensions placement to ensure they are aligned with the product.
Note that dimensions can only be applied to shots in Draft state. Published shots are locked and will appear as unselectable.
Styling
You have full line and label customization control, including colors, fonts, line weights, and styles. This includes:
Line styling: Customize color, weight (Light, Regular, Heavy), style (Solid, Dashed, Dotted), and endpoints (None, Short line, Line Arrow, Triangle arrow).
Label styling: Customize colors and choose from various web fonts.
Default styles: Manage default styles for all new dimensions.
Bulk style application: Ability to bulk apply default styles to existing dimension shots.
Individual control: Flexibility to change styles individually for specific dimensions within a single dimension shot.
Do note however that you cannot currently upload you own font files (.ttf) or paste custom font links to be applied to labels.
To add styling to your shots, follow the steps below:
Open the tool: Navigate to the Dimension Shots Draft tool for your chosen product.
Open the Style management panel: Select an existing dimension this will activate the right hand panel that contains all the settings.
Modify the styling settings: Choose from the different style settings.
Save your changes: To keep your edits and continue later click on “Save”.
You could also set a default for your dimension shots so that any shots created in the future don’t need to be set up individually. To do this, follow the steps below:
Open the tool: Navigate to the Dimension Shots tool.
Open the Style management panel: Click on “Manage Styles” in the right hand corner.
Select the styling settings for your default lines: Choose from the different settings then click “Save changes”.
Previews of your product configurations
You can build your dimension shot with a product in any of its configurations. By default, the tool will load the product images based on its default features and options. However, by clicking on the product image on the left-hand panel, you can select the specific configuration you would like to preview during your build.
Features and options affecting dimensions
Dimension shots do not automatically update the lines and values based on the features selected. For instance, a recliner can have a feature called “position” with options “Open” and “Closed” that affect the depth of the product. In order to visualize the change in the dimension, two separate dimension shots have to be created. The dimension line for the seat depth of the first dimension shot can be drawn with the “position” set to “opened” in the configuration preview, the second to “closed”.
Dimension shots can be downloaded or retrieved via CAPI. If retrieving via CAPI, however, be careful when retrieving your dimension shot in order to make sure you are pulling in the one that matches the layout of the product setup you have chosen. For example, if you have drawn dimensions based on the product with the “position” being set to “Open”, you do not want to accidentally copy and use the default configuration URL on the feature set to “Closed”. See the section “CAPI URL for implementation on your website” for more details.
Layout and aspect ratio
To make the creation of dimension shots as efficient as possible, there is an auto-layout feature that will automatically adjust the product image based on the lines drawn and the aspect ratio of the chosen frame. This means that there’s no need to adjust the layout to accommodate additional dimension lines, the interface will do so automatically. The same applies when a dimension line is deleted.
Save and Publish Once you have completed creating your dimension shot, you have several options:
Save your progress
Make the dimension shot available via the Cylindo CAPI
Download it by publishing
If changes to a published image need to be made, rather than creating a new dimension shot from scratch, simply make your updates and re-publish. If live on a website, the changes will be applied instantly.
Image download
To download an image you can simply click on the dots next to the product thumbnail on the left panel. Resolutions up to 4k are supported for downloads and are available in .jpg and .png file types. The image you download will be based on the product configuration selected on the preview.
CAPI URL for implementation on your website
A link to retrieve dimension shots from the CAPI can be found by clicking the 3 dots on a published dimension shot’s thumbnail from the main screen. The URL can be copied and used to embed the selected dimension shot on any website, however, it will be pulled in as the default configuration of the product.
The URL can be copied and used to embed the selected dimension shot on any website, however, it will be pulled in as the default configuration of the product.
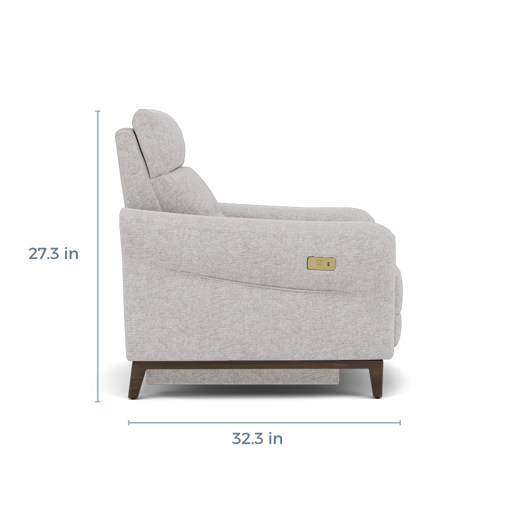
The dimension shot with code LOV9 has been drawn when previewing the product in the default configuration, with the feature “Position” set to “Closed”.
https://content.cylindo.com/api/v2/4965/products/ARMCHAIR-DS-DEMO/dimensions/ARMCHAIR-DS-DEMO.png?size=512&version=2&dimensionCode=LOV9&dimensionLabelUnit=In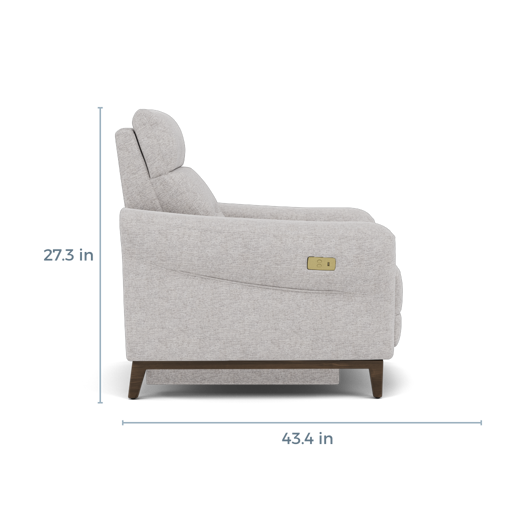
https://content.cylindo.com/api/v2/4965/products/ARMCHAIR-DS-DEMO/dimensions/Dimension-shot_3UL7_In_512.jpg?size=512&?feature=POSITION:OPEN&version=2&dimensionCode=3UL7&dimensionLabelUnit=In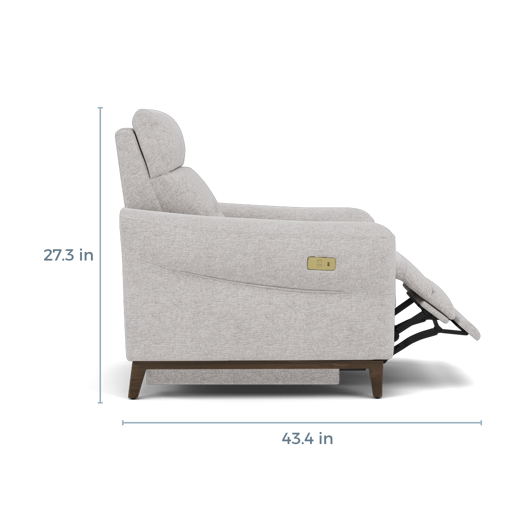
https://content.cylindo.com/api/v2/4965/products/ARMCHAIR-DS-DEMO/dimensions/Dimension-shot_3UL7_In_512.jpg?feature=POSITION:OPEN&size=512&version=2&dimensionCode=3UL7&dimensionLabelUnit=InThe dimension shot with code 3UL7 instead has been drawn when previewing the product with the feature “Position” set to “Open”. Therefore, because the default configuration does not match with the length drawn, the “?feature=POSITION:OPEN&” needs to be appended in the URL to display the right configuration.
Here are some additional examples below:
Default (yellow upholstery black aluminum legs)
https://content.cylindo.com/api/v2/4508/products/MARKETING%201/dimensions/MARKETING%201.png?size=512&version=2&dimensionCode=HEXN&dimensionLabelUnit=InBlue upholstery and black aluminum legs
https://content.cylindo.com/api/v2/4508/products/MARKETING%201/dimensions/MARKETING%201.png??feature=FINISH:BLACK%20POWER%20COATED%20ALUMINIUM&feature=UPHOLSTERY:6743271&size=512&version=2&dimensionCode=HEXN&dimensionLabelUnit=InDotted upholstery and steel legs
https://content.cylindo.com/api/v2/4508/products/MARKETING%201/dimensions/MARKETING%201.png?feature=FINISH:Chromed%20Steel&feature=UPHOLSTERY:6753277&size=512&version=2&dimensionCode=HEXN&dimensionLabelUnit=InDeleting a Dimension Shot
Unpublished dimension shots can be deleted at any time, however, published dimension shots cannot. This logic is in place to ensure that no deletion of a dimension shot will affect any live implementation on any website. If you need to delete a published dimension shot, remove the link that you have implemented on your site before deleting it. The deletion of a product from your library will disable all the CAPI URLs of any published dimension shots associated with the product.
Was this helpful?
Still need help? Ask the team