Quickshot 3D Editor: Multi-Product support
Overview
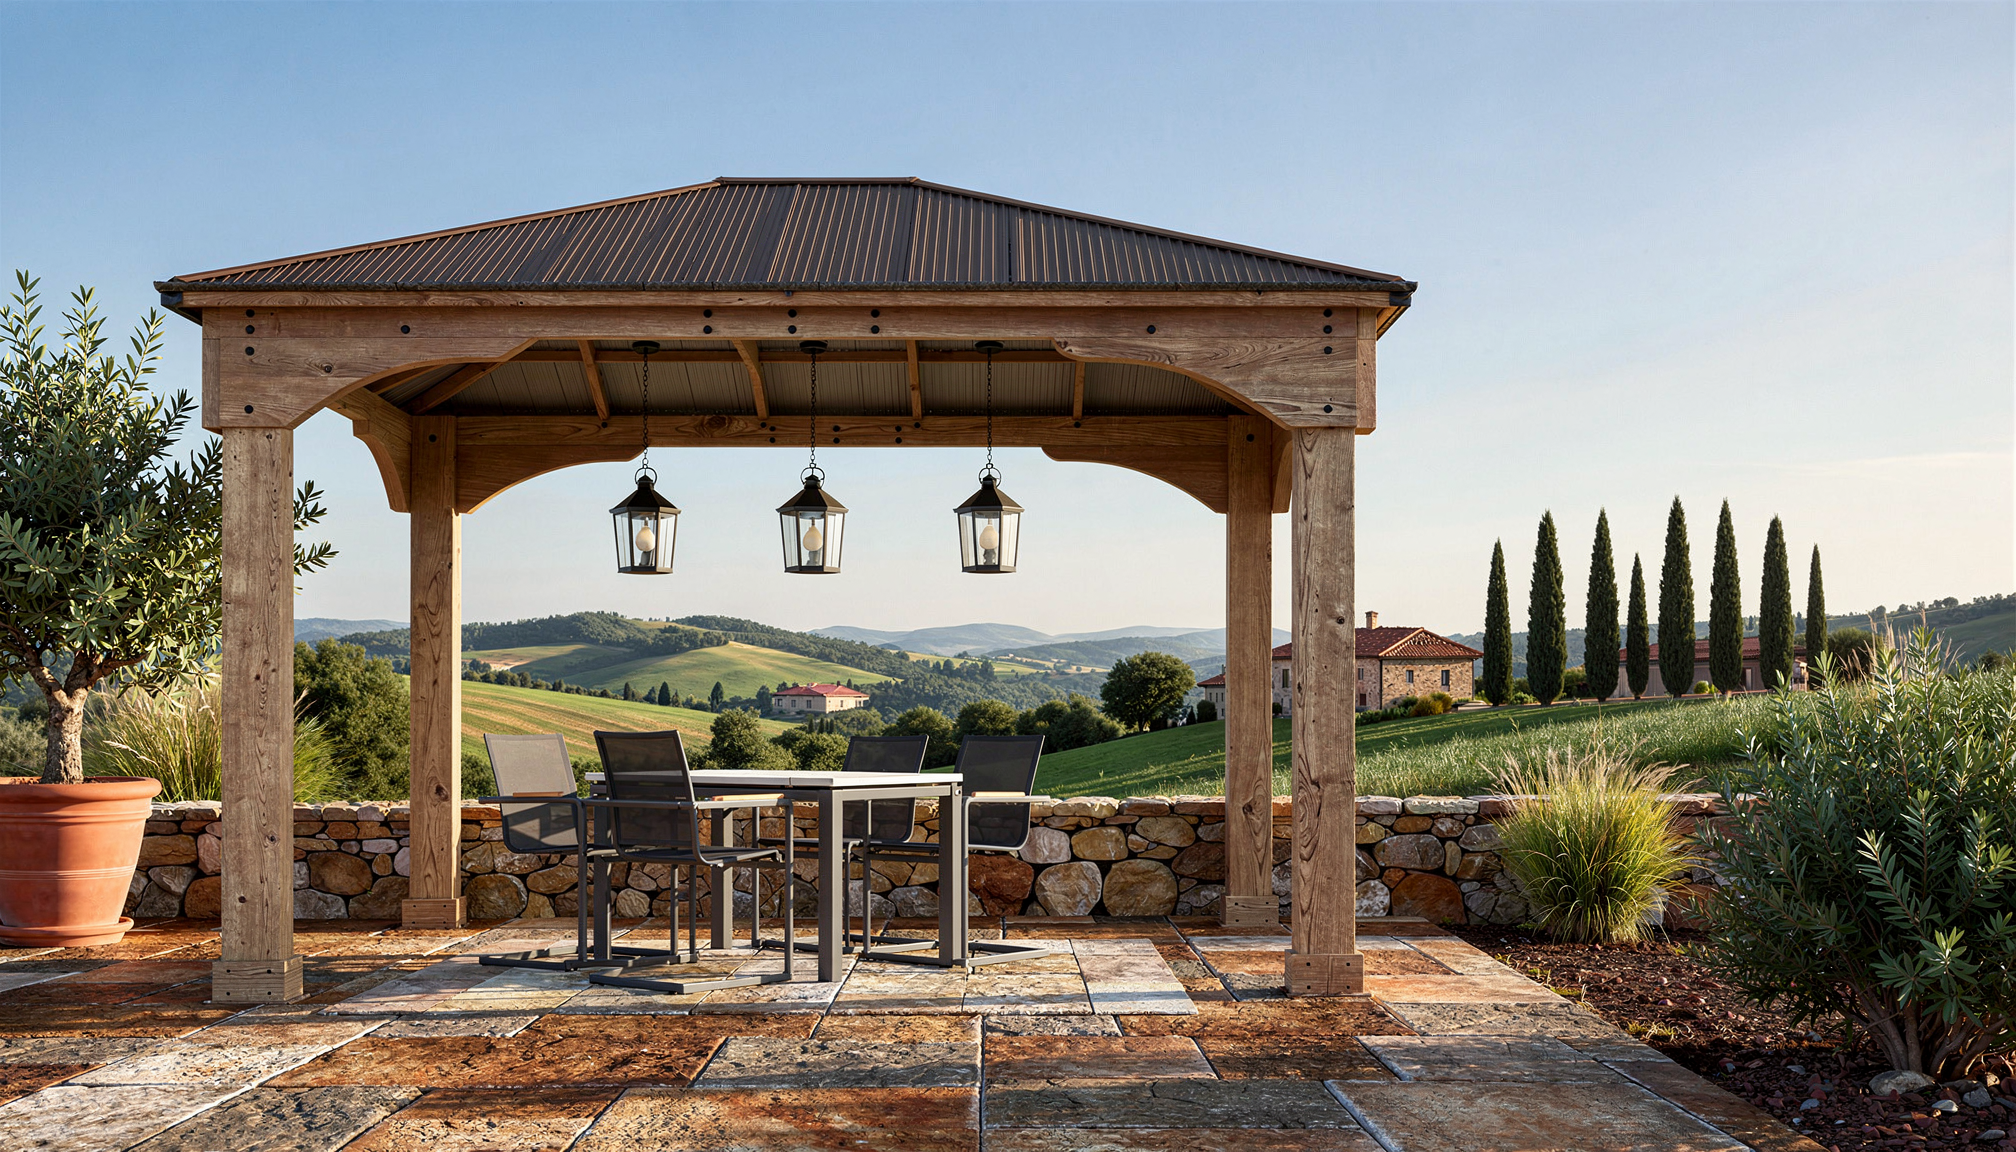
The Quickshot 3D Multi-Product Update introduces two significant improvements to the Quickshot 3D workflow: the ability to place multiple products within a single visual, and a streamlined interface that makes the entire generation process faster and more efficient.
Previously, only one product could be placed per visual in the 3D workflow. This update removes that limitation, enabling users to compose richer lifestyle visuals featuring multiple products in a single scene — without leaving the 3D environment at any point during the process.
The 3D editor remains the only workflow in Quickshot that gives users full creative control over product placement, orientation, scale, and close-up shots. This level of precision — particularly the ability to control the sense of scale between products and their environment — is exclusive to the 3D editor and cannot be achieved through the 2D canvas workflow.
What's New
Multi-product support
You can now place one or more products directly within the 3D scene. Products can be swapped and adjusted freely before and during generation.
Faster 3D workflow
The updated workflow eliminates the multi-step process previously required to generate images. You now enter directly into a 3D scene, place your products, enter your prompt, and queue generation — all without leaving the scene. Generations are queued automatically, so you can continue working while previous requests are being processed.
What You Will Learn
How to place multiple products in a 3D scene
How to configure and refine your composition
How to use the new prompt and generation queue
How to review, edit, and publish your generated images
Tutorial: Using the Quickshot 3D Workflow
💡 Prerequisites: The 3D workflow requires a Cylindo Master Asset. Products without a Master Asset cannot be used in the 3D editor. If you need to create visuals for products without a Master Asset, refer to the Media Product Integration in Quickshot article.
Step 1 — Enter the 3D editor
From the Quickshot interface, select the 3D Editor tab to enter the 3D scene directly. This is your starting point for the entire workflow.
Step 2 — Select and place your products
Select a product from the product list to place it in the 3D scene. You can place one or more products in the same scene.
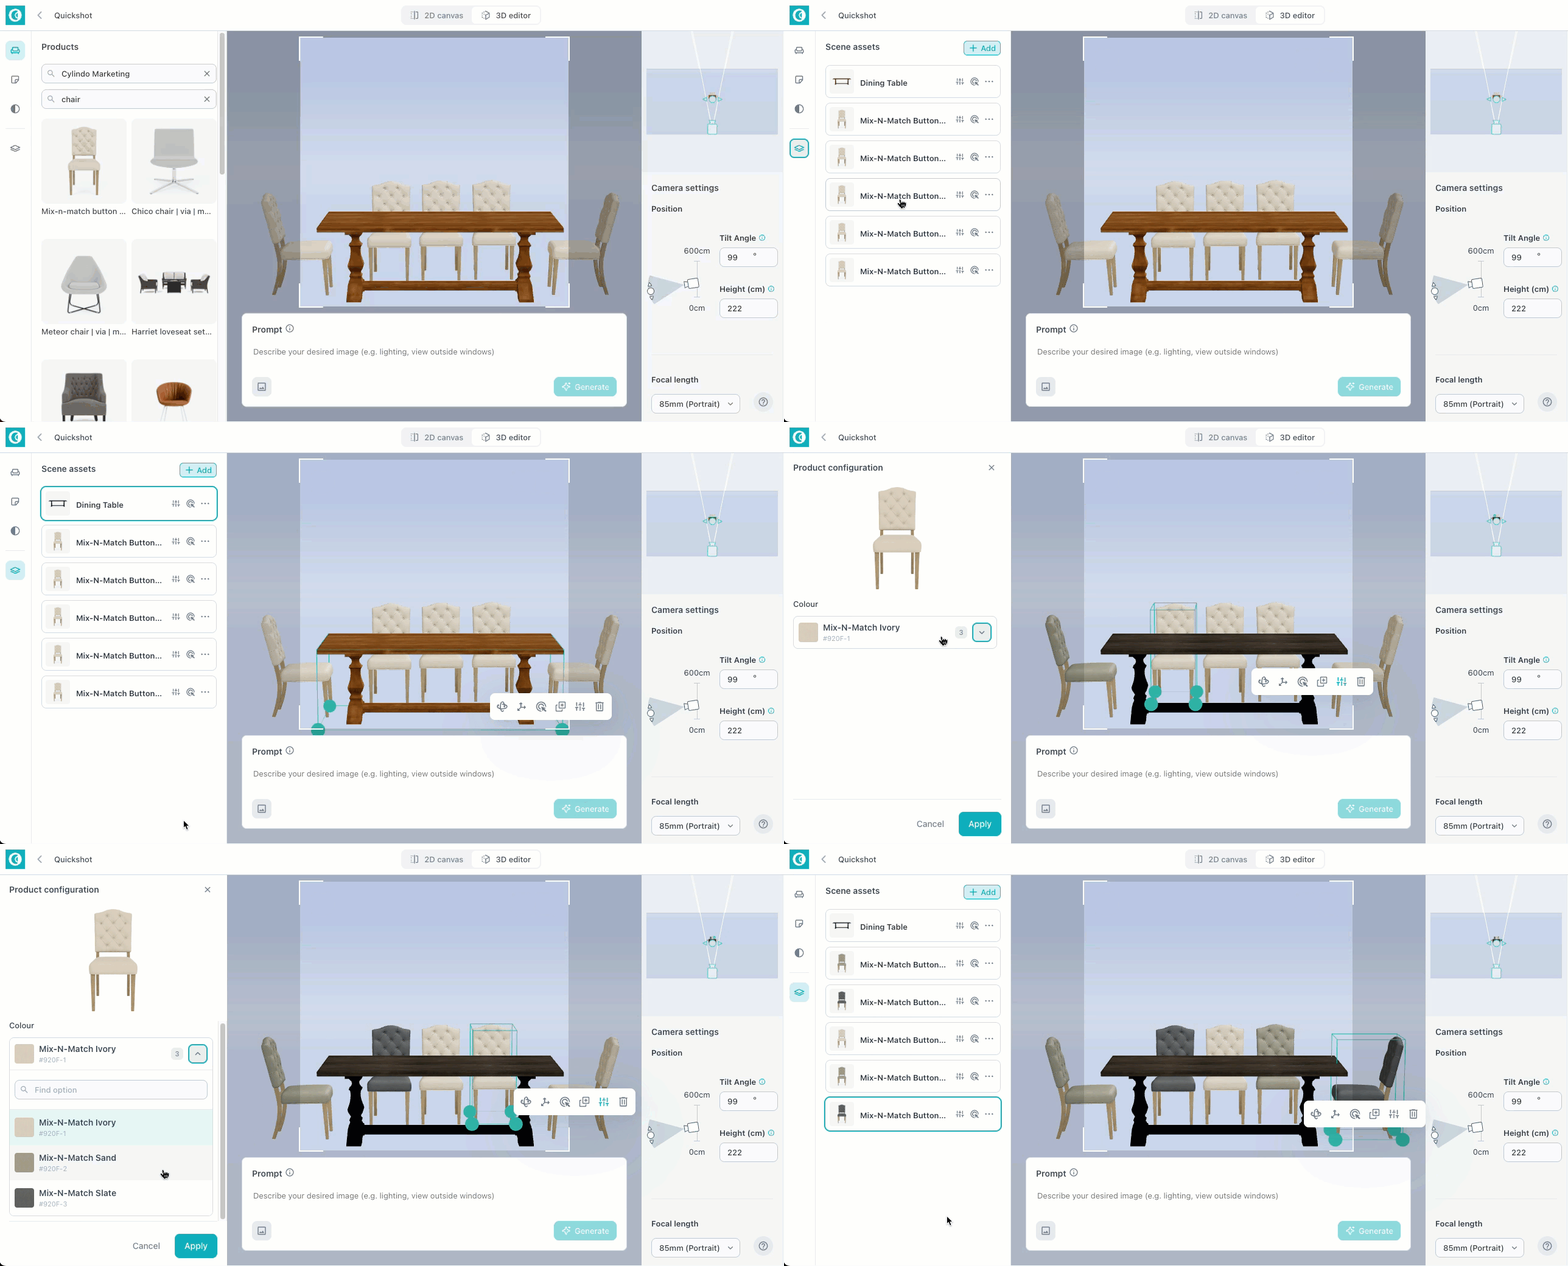
Once a product is placed, click its context menu to configure it — adjusting its position, orientation, and other properties directly within the scene.
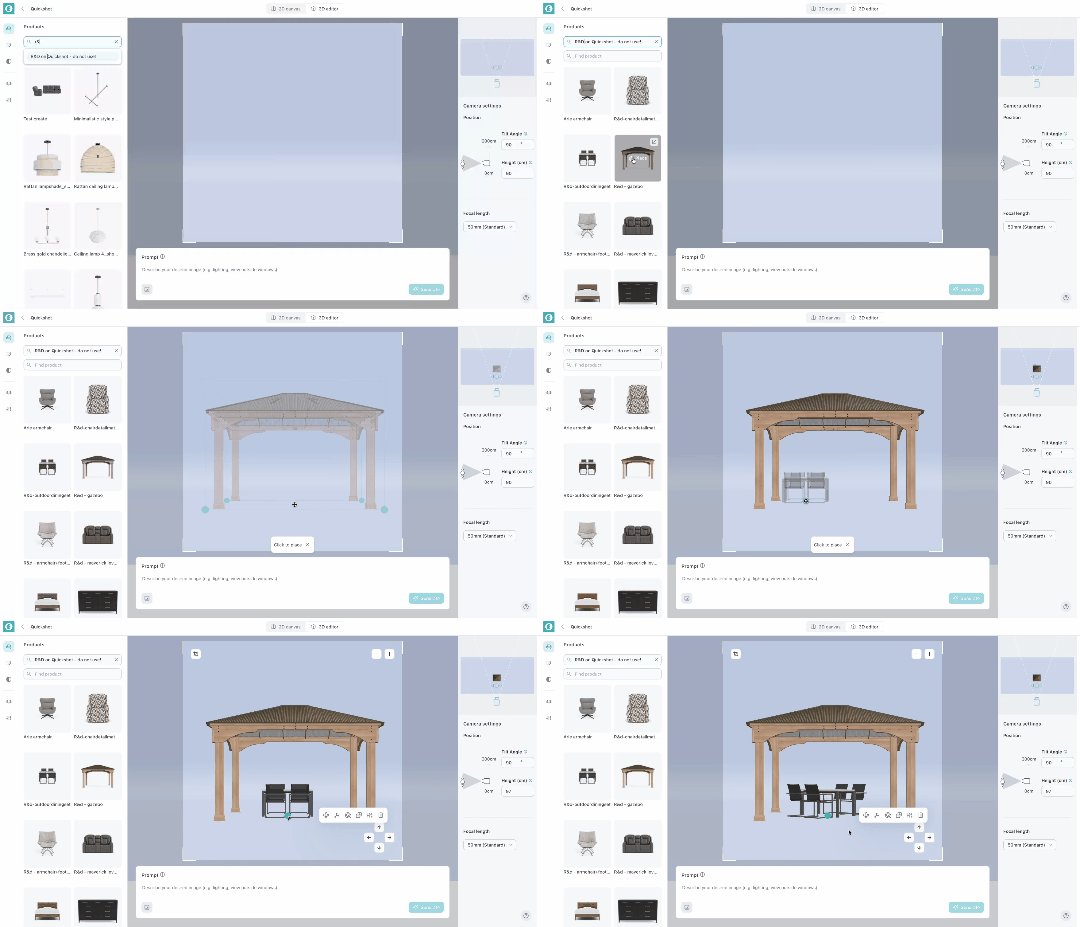
If the product is a Cylindo Master Asset with multiple features and options, its configuration can be edited directly from the Scene Assets tab. The tab displays all assets currently featured in the 3D scene, and for any model that supports multiple features and options — such as different materials, colours, or finishes — you can amend the configuration without leaving the scene. This does not apply to products in a single fixed configuration.
Since certain features and options affect the physical dimensions of a product — for example, a sofa available in different sizes or a table with extension leaves — the 3D model will automatically reflect those changes in the scene. This ensures that the sense of scale between all products in the composition is accurate and consistent, guiding the generation to produce results that faithfully represent real-world proportions.
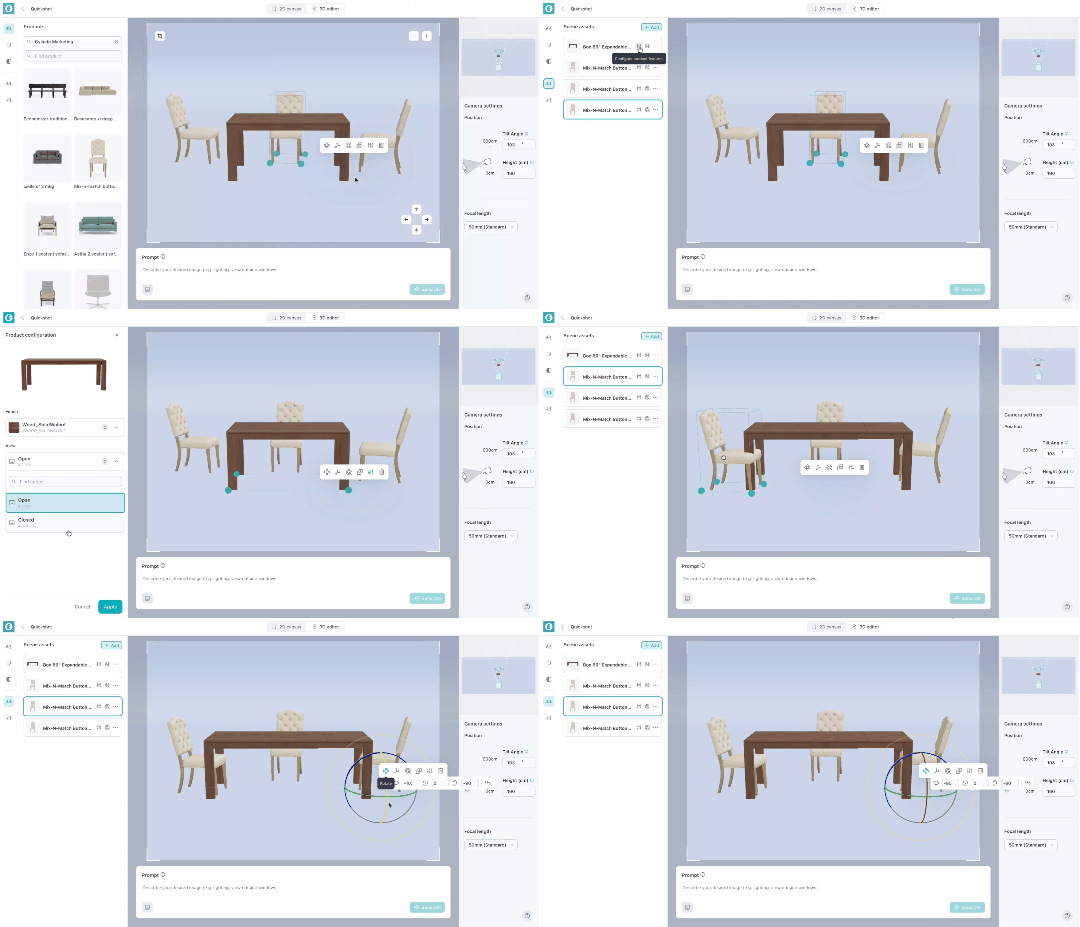
Achieving this level of dimensional accuracy without a Master Asset requires manual adjustment and a precise knowledge of each product's dimensions, making it significantly more time-consuming and prone to error.
Step 3 — Duplicate products if needed
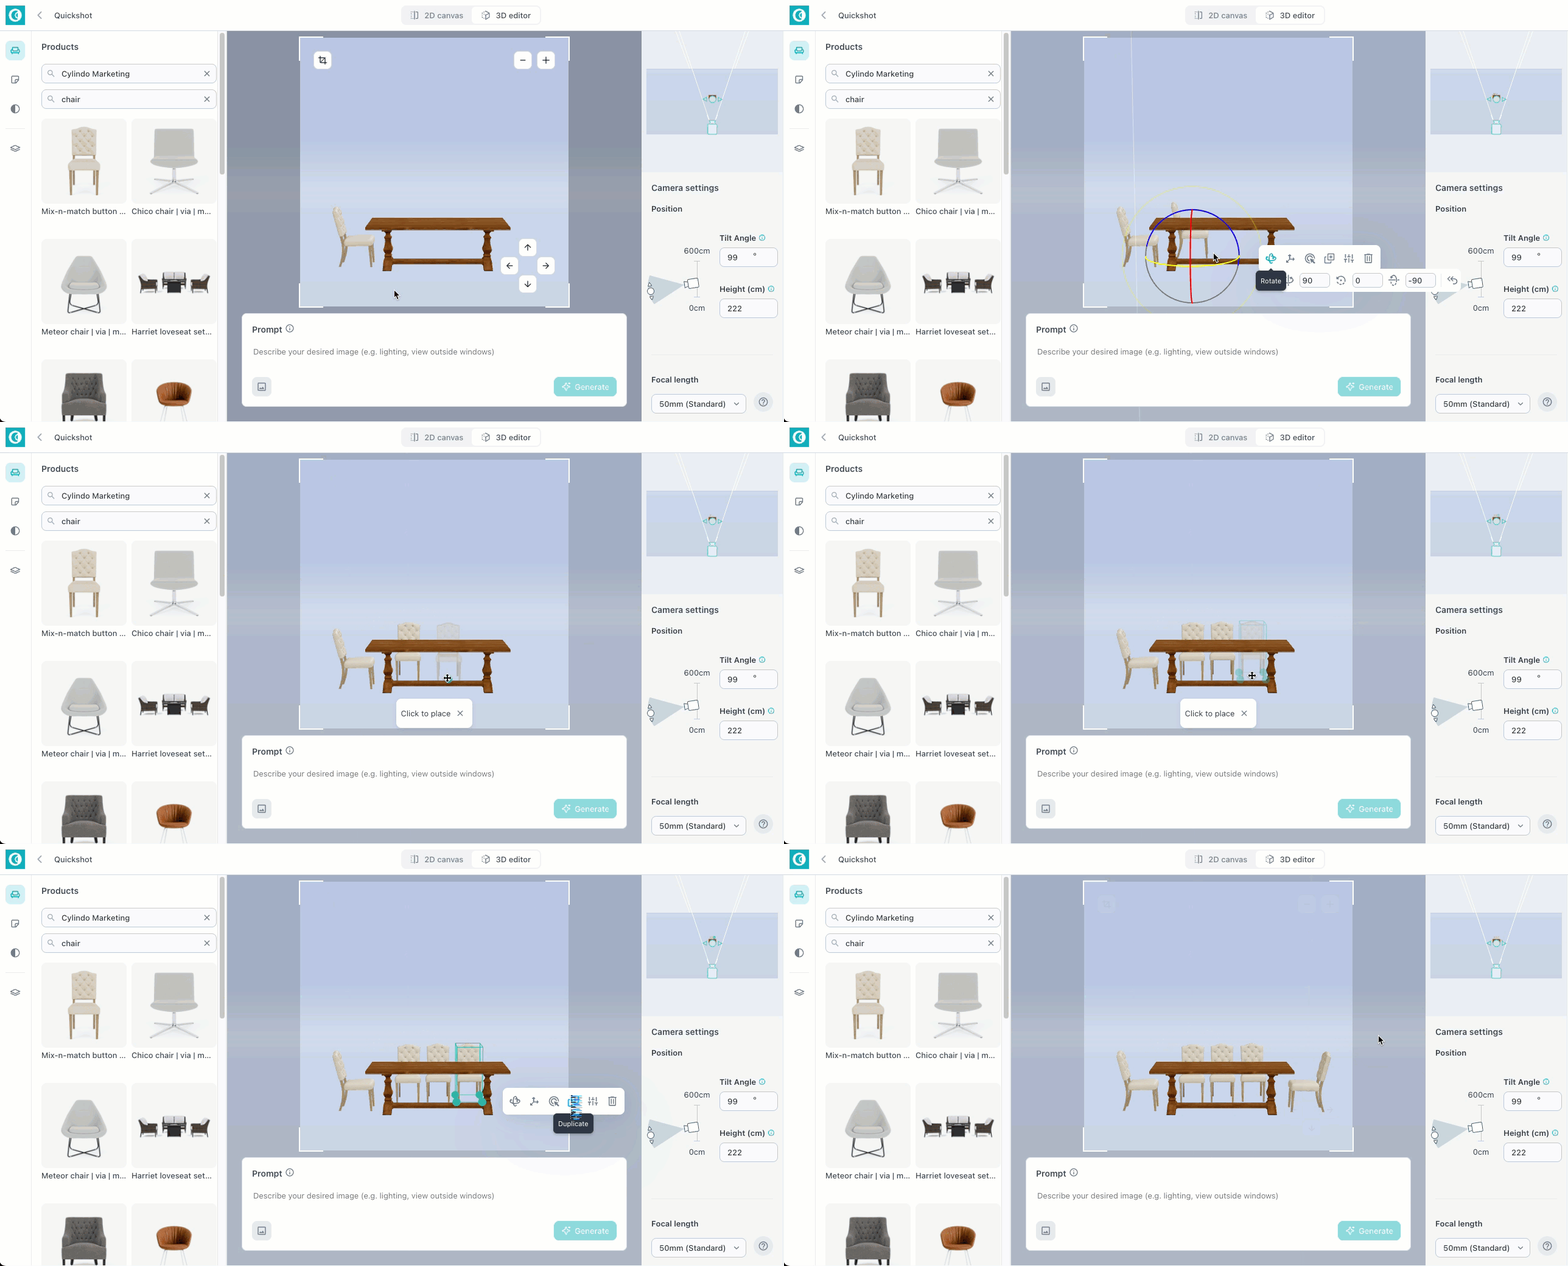
Use the duplicate function to add multiple instances of the same product to the scene. This is particularly useful for compositions such as dining chairs or sets where repetition is part of the design.
Step 4 — Refine your composition
With your products placed, refine the scene using the following controls:
Move objects — reposition products freely within the scene
Camera focal length — adjust the lens to control perspective and depth. Available focal lengths: 24mm, 50mm, 85mm, and 135mm
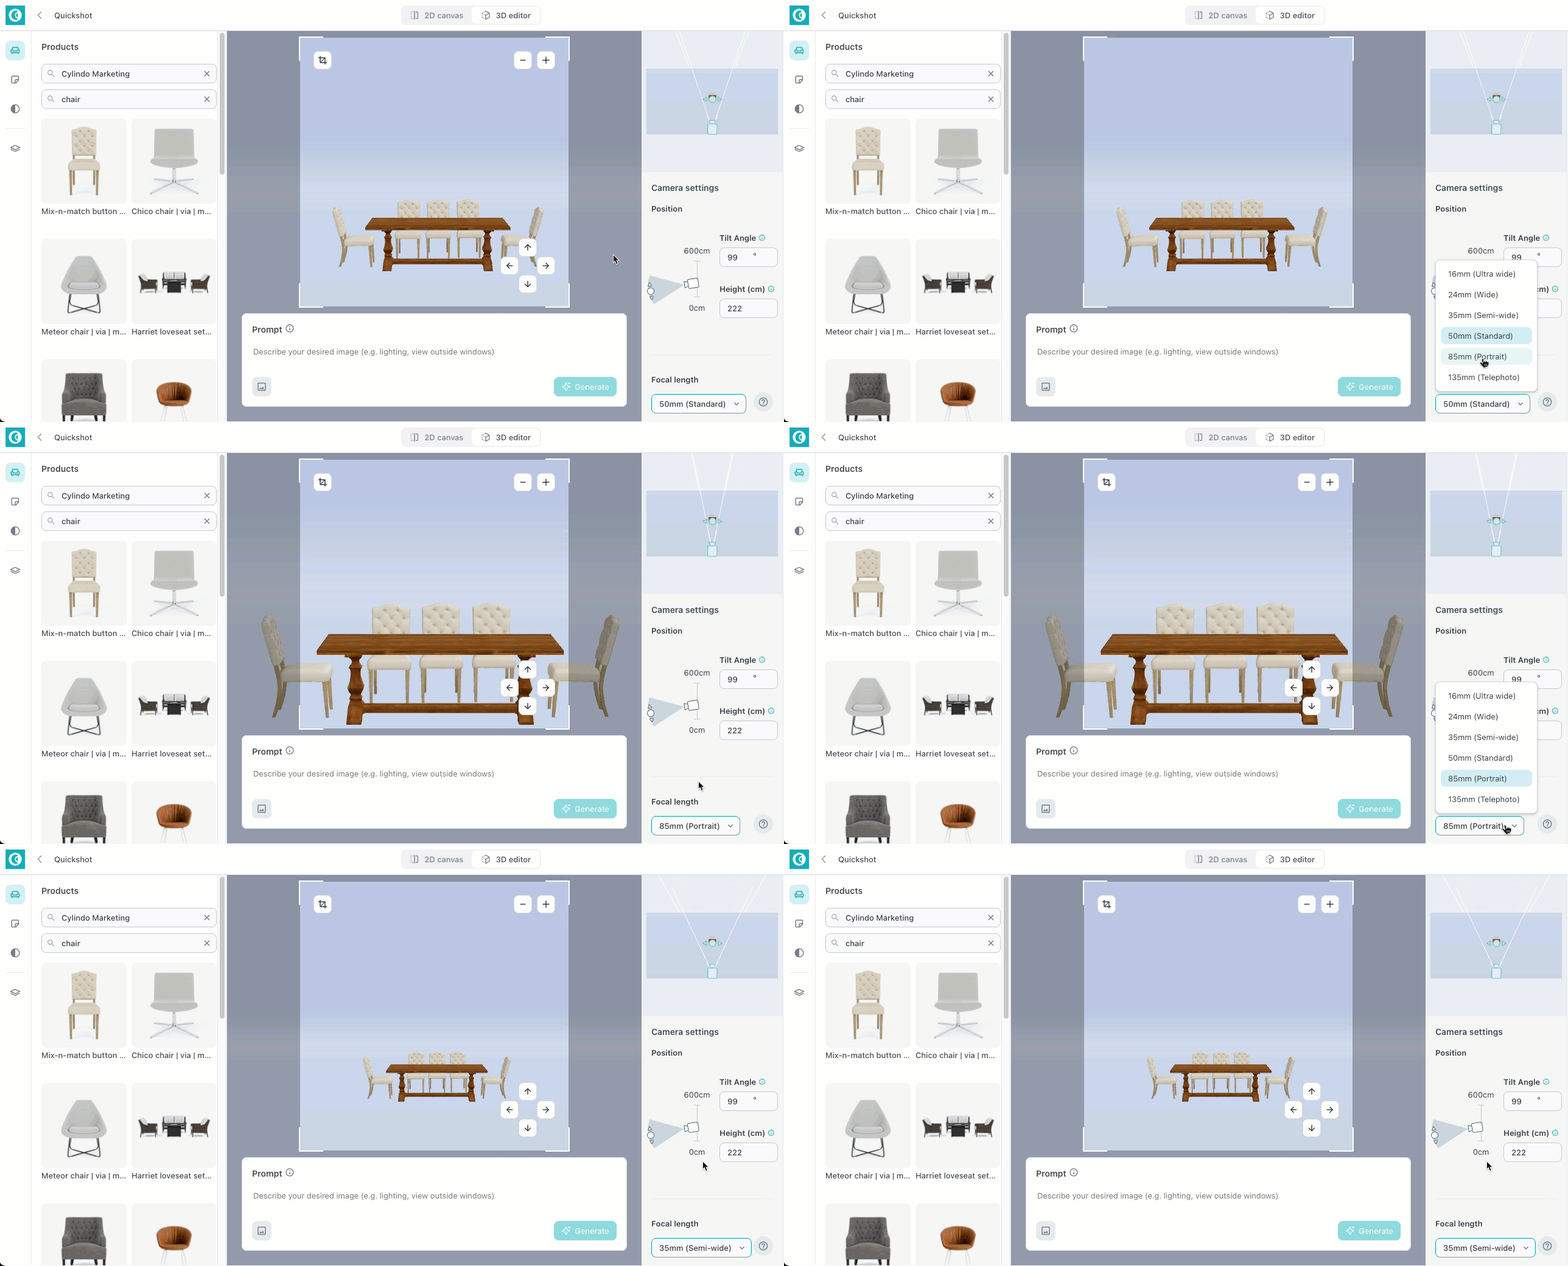
Aspect ratio — set the output format to match your intended use
Step 5 — Select scene assets
Open the dedicated Scene Assets tab to browse and select the environment, surfaces, and background elements for your scene.
Step 6 — Enter a prompt and generate
Once you are happy with your composition, move to the generation controls. You can:
Enter a text prompt describing the lifestyle s
cene you want to generate
Upload a reference image to guide the visual style and mood
Select a preset from the dedicated presets tab as a starting point
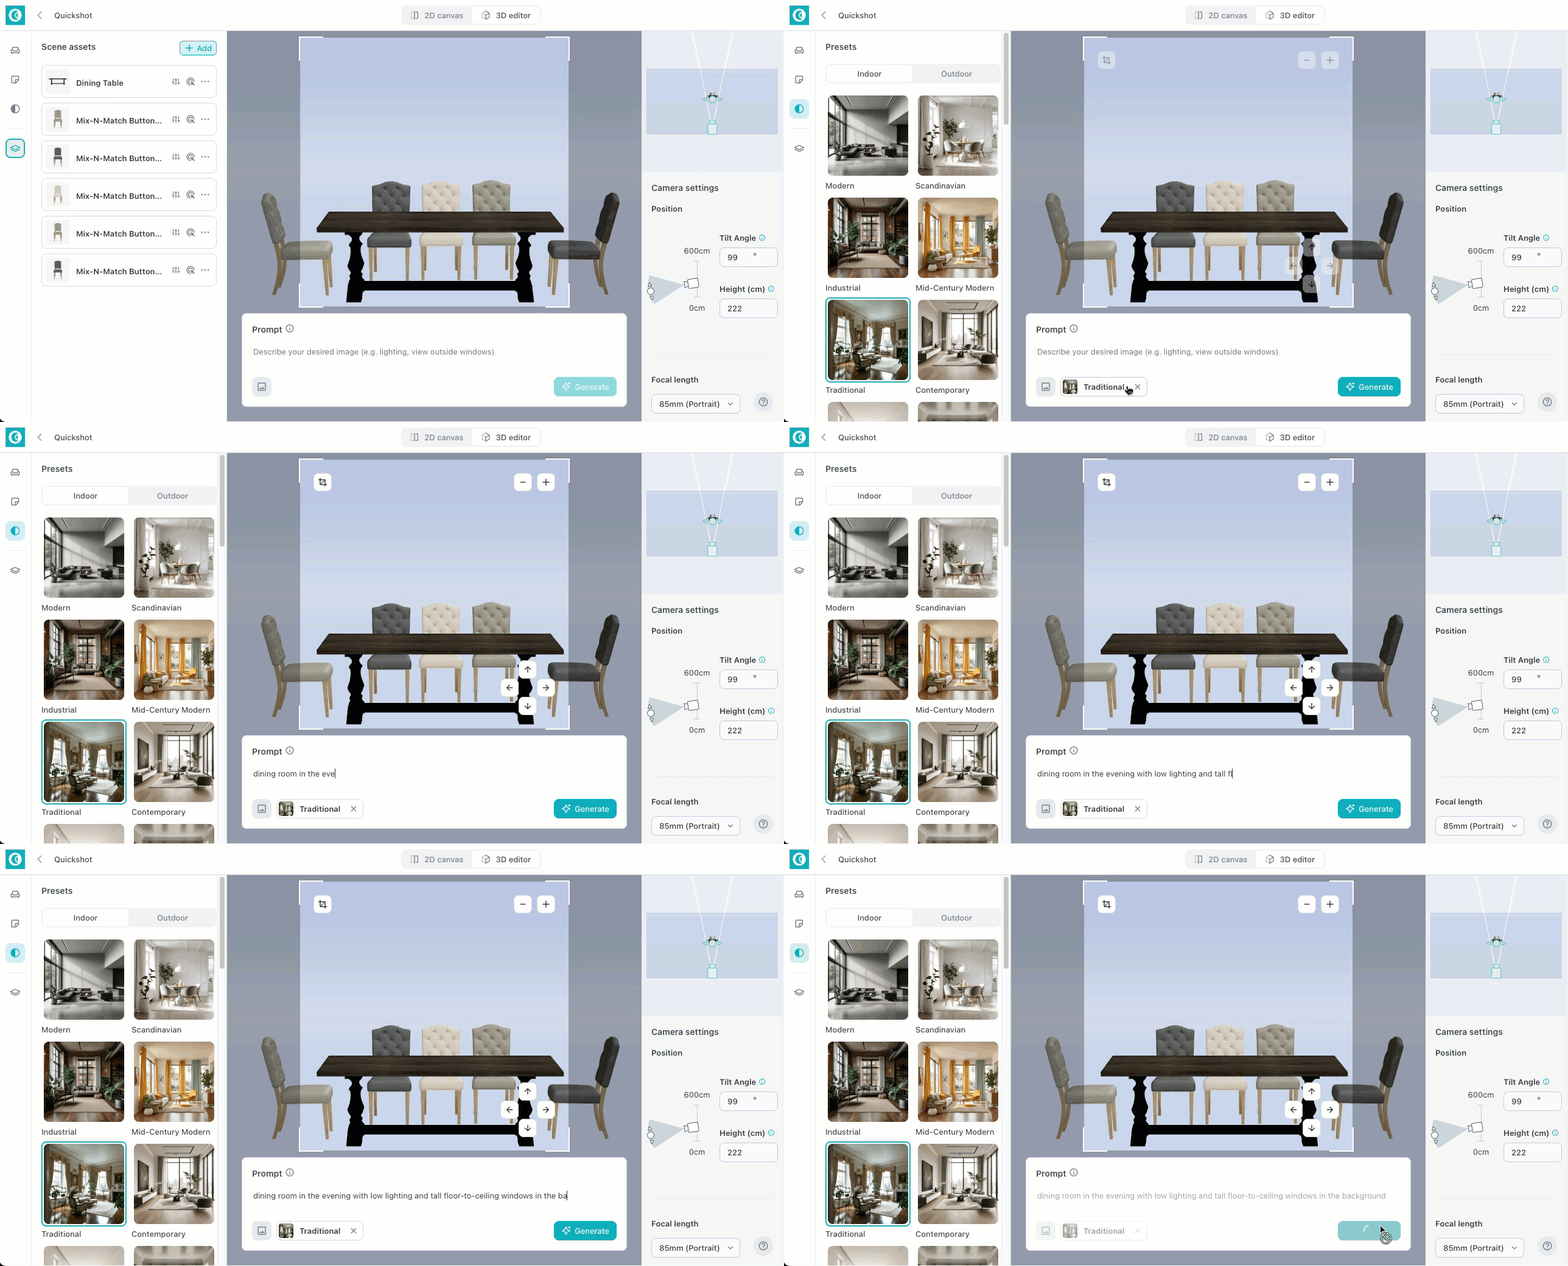
When ready, queue your generation. You can continue adjusting or swapping products in the scene while your generation is being processed — all without leaving the 3D editor.
Step 7 — Review, edit and publish your generated images
Once images are returned, they will be automatically labelled with all the products featured in the 3D scene, making it easy to identify which products appear in each visual at a glance.
From the results view you can edit the images before publishing, and publish them directly to make them available in the Curator.
Once published, every product featured in a given image will be able to use that image in the Curator — regardless of which product was the primary subject of the scene. This means a single multi-product visual can serve multiple products simultaneously, reducing the number of visuals you need to produce.
Known Limitations & Disclaimer
⚠️ This section outlines current limitations of the Quickshot 3D Multi-Product Update. These are subject to change as the feature evolves.
1. One configuration per product per visual
Each product can only be featured in a single configuration within a given visual. If you need to showcase the same product in multiple configurations, separate visuals will need to be generated.
2. Generation time is longer than the 2D canvas workflow
Due to the complexity of the 3D rendering process, generation times are longer compared to the 2D canvas workflow. We recommend using the generation queue to continue working while images are being processed.
3. 3D editor and advanced generation models are not yet combined
We are currently working on combining different generation models to bring together the creative control and precise sense of scale of the 3D editor with the scene complexity and richness achievable by other models. This will be available in a future update.
In the meantime, the Smart Edit feature allows you to add details and elements to a generated image while preserving the sense of scale and camera perspective established by the 3D scene — offering a practical way to enrich your visuals without losing the compositional accuracy of the original generation.
4. Studio templates cannot be imported into Quickshot
At this time, Studio templates cannot be imported into Quickshot. Scene setup must be done directly within the Quickshot 3D editor. This is something we are looking to address in a future update.
FAQ
What camera focal length options are available in the 3D editor?
Four focal lengths are available: 24mm, 50mm, 85mm, and 135mm. These cover a wide range of perspectives, from wide-angle compositions to tighter, more compressed shots.
Can I create top-down shots in the 3D editor?
Yes. Top-down and overhead shots are supported. Keep in mind that extreme camera angles may reduce product accuracy — the closer the camera angle is to the 32 rendered frames of the Master Asset, the better the output quality will be.
What resolution are generated images?
Generated images are currently output at a maximum of 2048px on the longest side, across all supported aspect ratios.
Can I do close-up shots of products?
Yes. The 3D editor supports close-up shots, giving you control over how much of the product fills the frame. As with extreme angles, results will be most accurate when the camera position stays close to the standard rendered frame range.
How many products can I place in a single 3D scene?
There is no known limit on the number of products you can place in a single scene.
Can I save a scene and come back to it later?
Scenes are not saved as drafts, but any generated image retains the full 3D scene and prompt used to create it. To reload a previous composition, locate the generated image and click Generate Similar — this will reload the entire 3D scene and prompt elements, allowing you to pick up where you left off.
Can the same generated image be used for multiple products in the Curator?
Yes. A single image featuring multiple products can be used by each of those products in the Curator. The image must be published first — once published, every product featured in it will have access to that image.