Rendering a studio scene with lights from props
Intro
Some props, such as lamps, can include their own light. Because Studio normally renders scene elements separately, a light from one prop may not illuminate the other products in the final image.
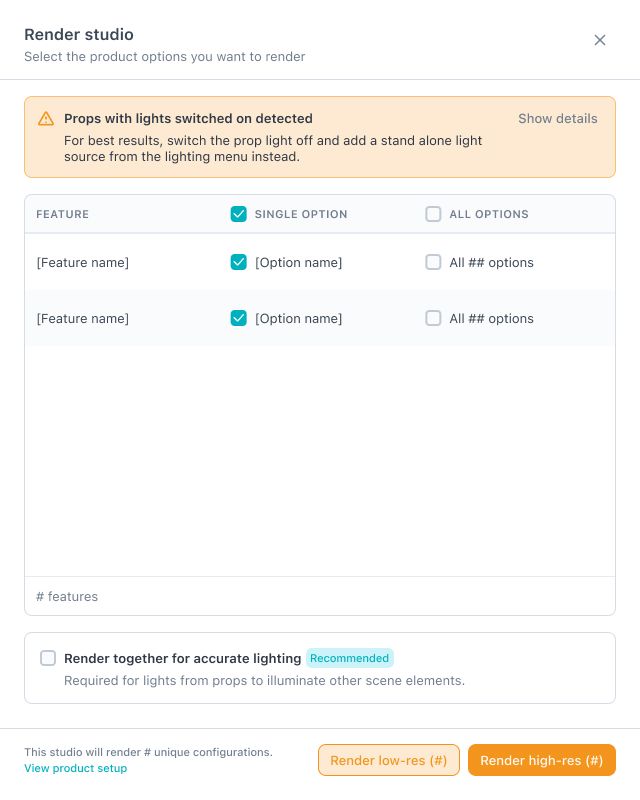
When Studio detects an active prop light, you will see a warning in the Render studio panel. You can resolve it in one of two ways:
Option 1: Add a separate light
For the most consistent results, switch off the light built into the prop and add a separate light to the scene instead.
Close the Render studio panel.
Switch off the light attached to the prop by changing the prop option from on to off.
Select Lighting at the bottom of Studio.
Add a sphere light or rectangle light.
Position the new light near the prop and adjust its intensity, size, temperature, or color.
Preview the scene and make any final adjustments.
Select Render when you are ready.
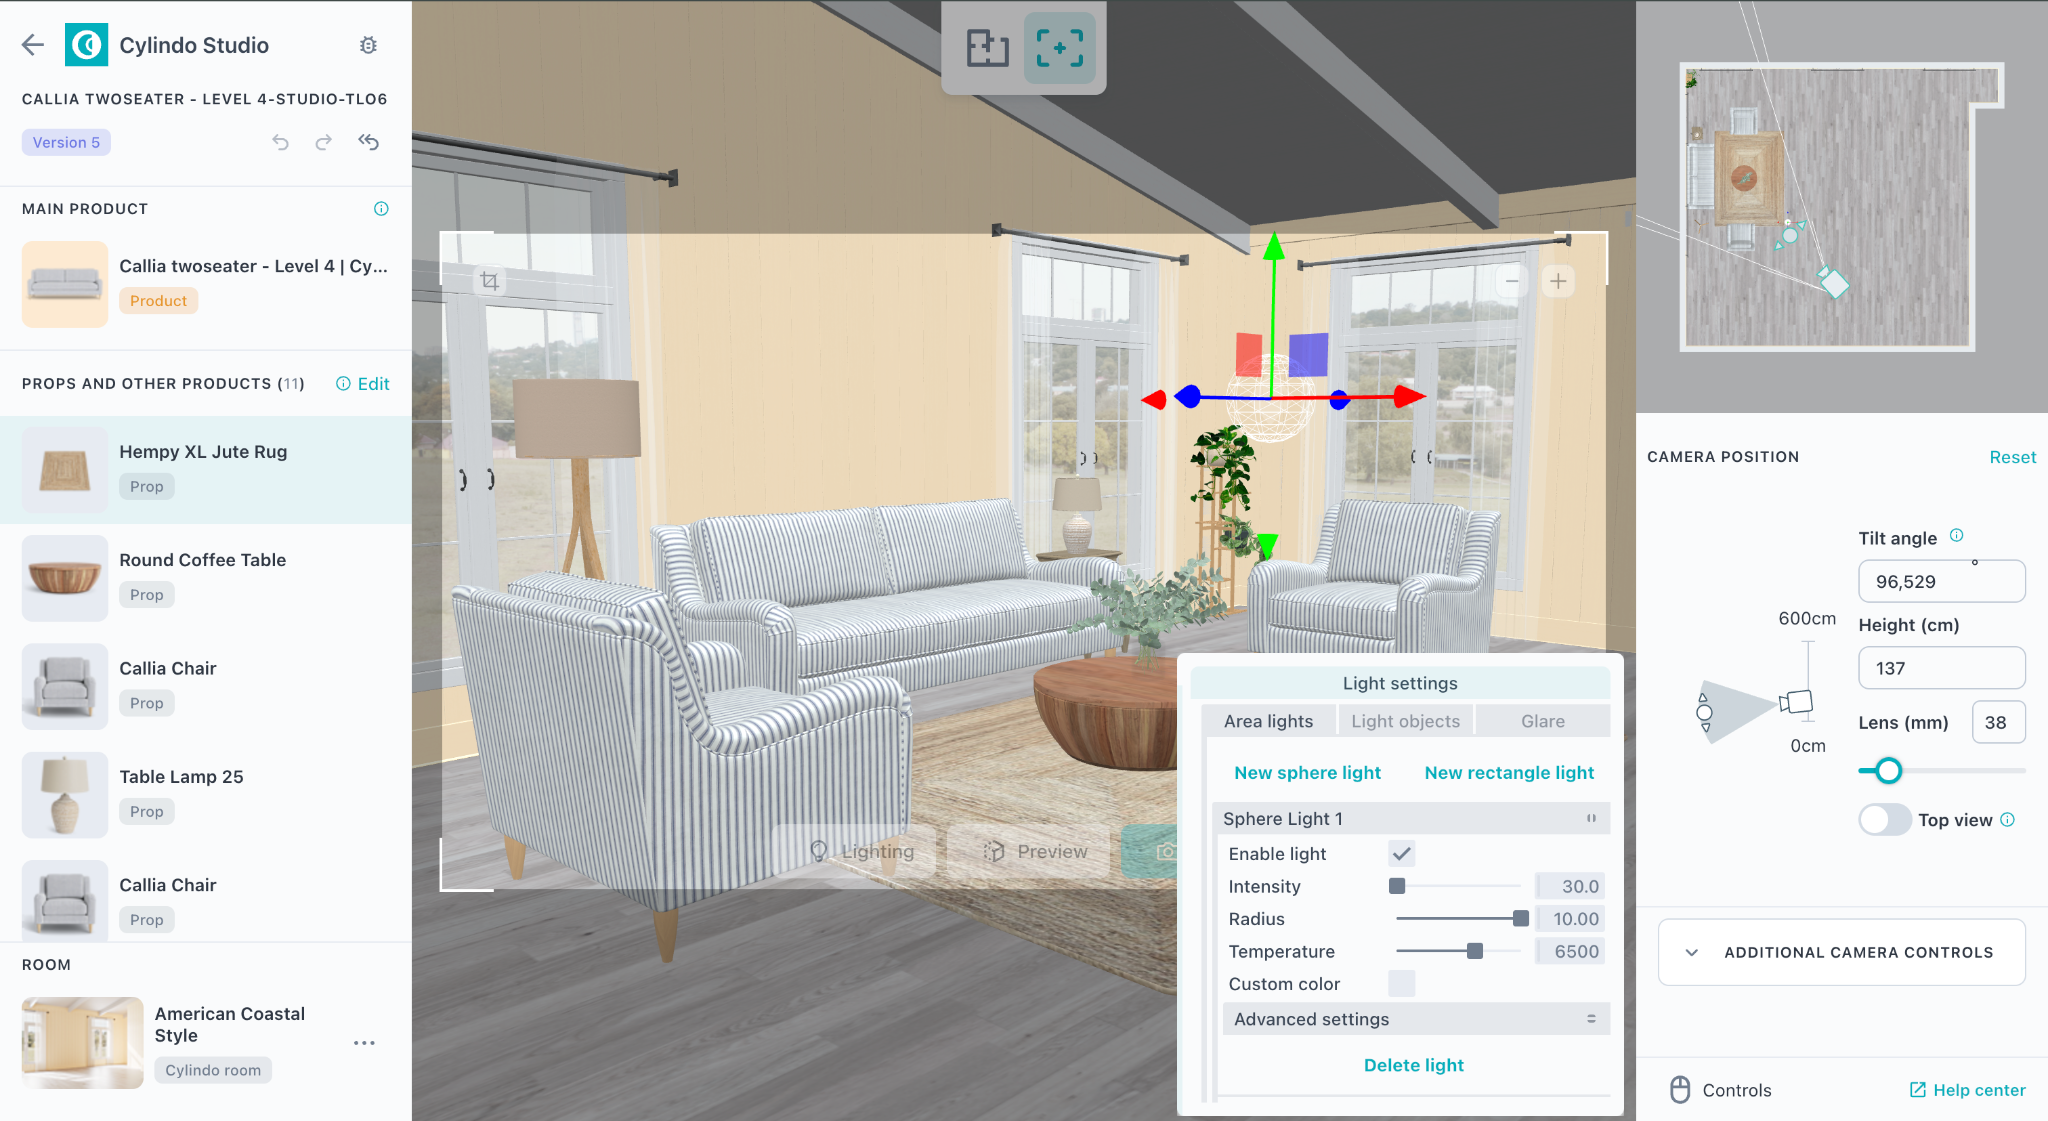
Using a separate light allows Studio to render product options independently while keeping the scene lighting consistent.
Option 2: Render everything together
If you want to keep the light attached to the prop:
Select Render.
In the Render studio panel, select Render together for accurate lighting.
Choose the product options you want to include.
Select Render low-res for a quick test or Render high-res for the final image.
Studio will render all products and props together, however the prop light might not accurately illuminate the entire scene.
Which option should I choose?
Add a separate light when you want the most flexibility and consistent results across product options.
Render everything together when keeping the light attached to the prop is important for the scene.