How to create a Studio
A Studio must feature at least one of your products in a room, either custom or from the Cylindo library, and can feature one or multiple props.
There are multiple ways to create a Studio: with a Studio template, creating a Studio from scratch, or copying an existing Studio.Studio templates
Creating a Studio from a template is the fastest way to create lifestyle or silo imagery. Access the template library by navigating to the Studio page from your left side menu, then click on the Template tab. From here, you can see both the templates from the Cylindo library and the ones that you or your colleagues have created.
To create a Studio from a template, simply select the template that you wish to use and click on “Create studio”. You will be prompted to select the main product you would like to use the template for. Whichever you select will take the exact position of the demo product on the template.
From the same screen you will get an overview of all the props that are in the template layout.
After clicking on “Create studio” the scene will load and you can start customizing it by:
Swapping, removing, adjusting the position, or changing the configuration of props
Amending the camera position
Changing the materials of walls, floors, and other elements of the room
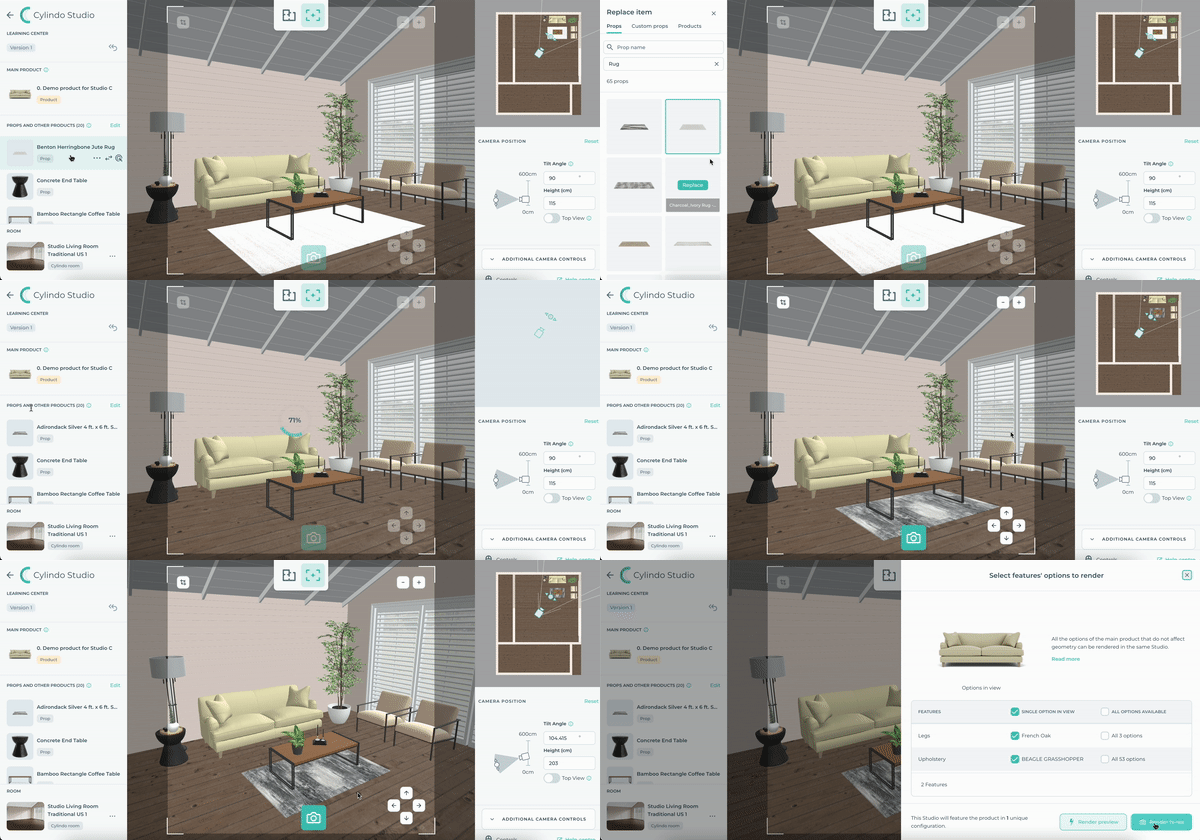
Click on the render button when you are happy with the changes.
Please note that the lighting setup is optimized for the camera angle used in the template default. We cannot guarantee that a scene will be lit correctly when the camera is pointing to areas of the room distant from the one originally set in the template.
Revert changes
You can revert all the changes you have made since the beginning of the session by clicking on the related button on the top of the left panel.
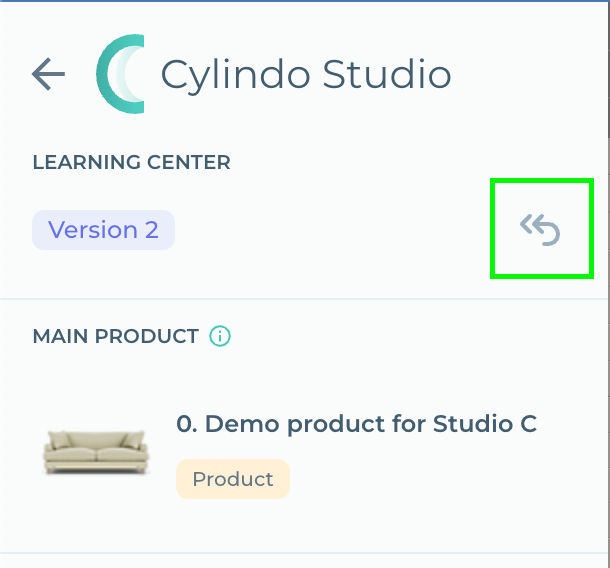
Please note that any elements of the Studio will be reverted to the initial state:
The camera position
The configuration of room and objects in the scene
The position of any product and props
Custom templates
You can create your own templates to speed-up the creation of lifestyle images at scale and achieve visual consistency across products.
To do so simply open the page of the Studio of your choice and click on “Create Studio template”. Please note that the button is available only for rendered studios.
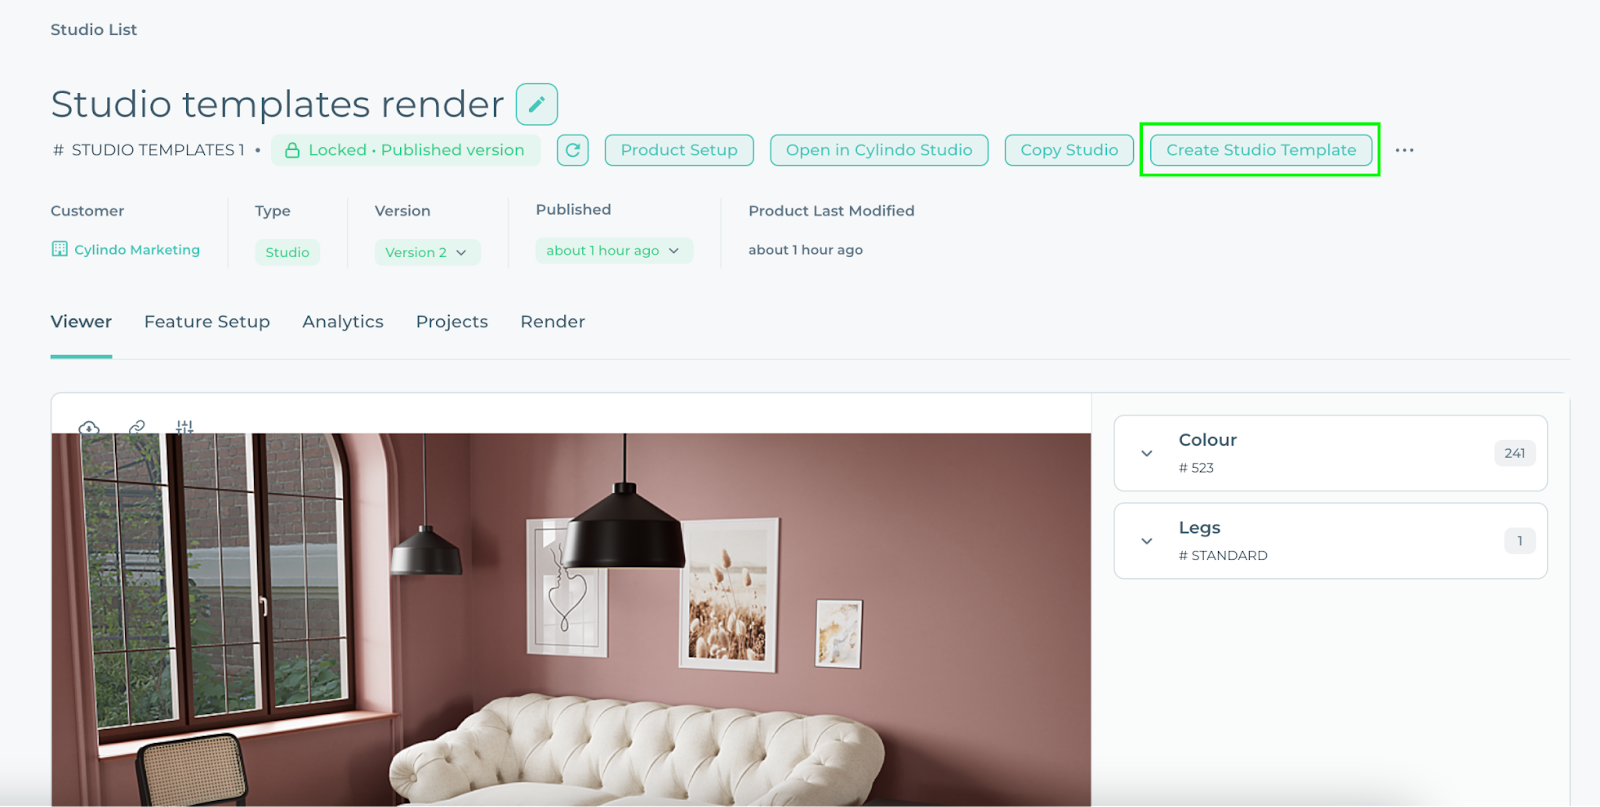
You will be able to change the template name as you like by clicking on the edit icons next to the template name.
The newly created template can be used by any member of your organization to produce lifestyle images.
Main product
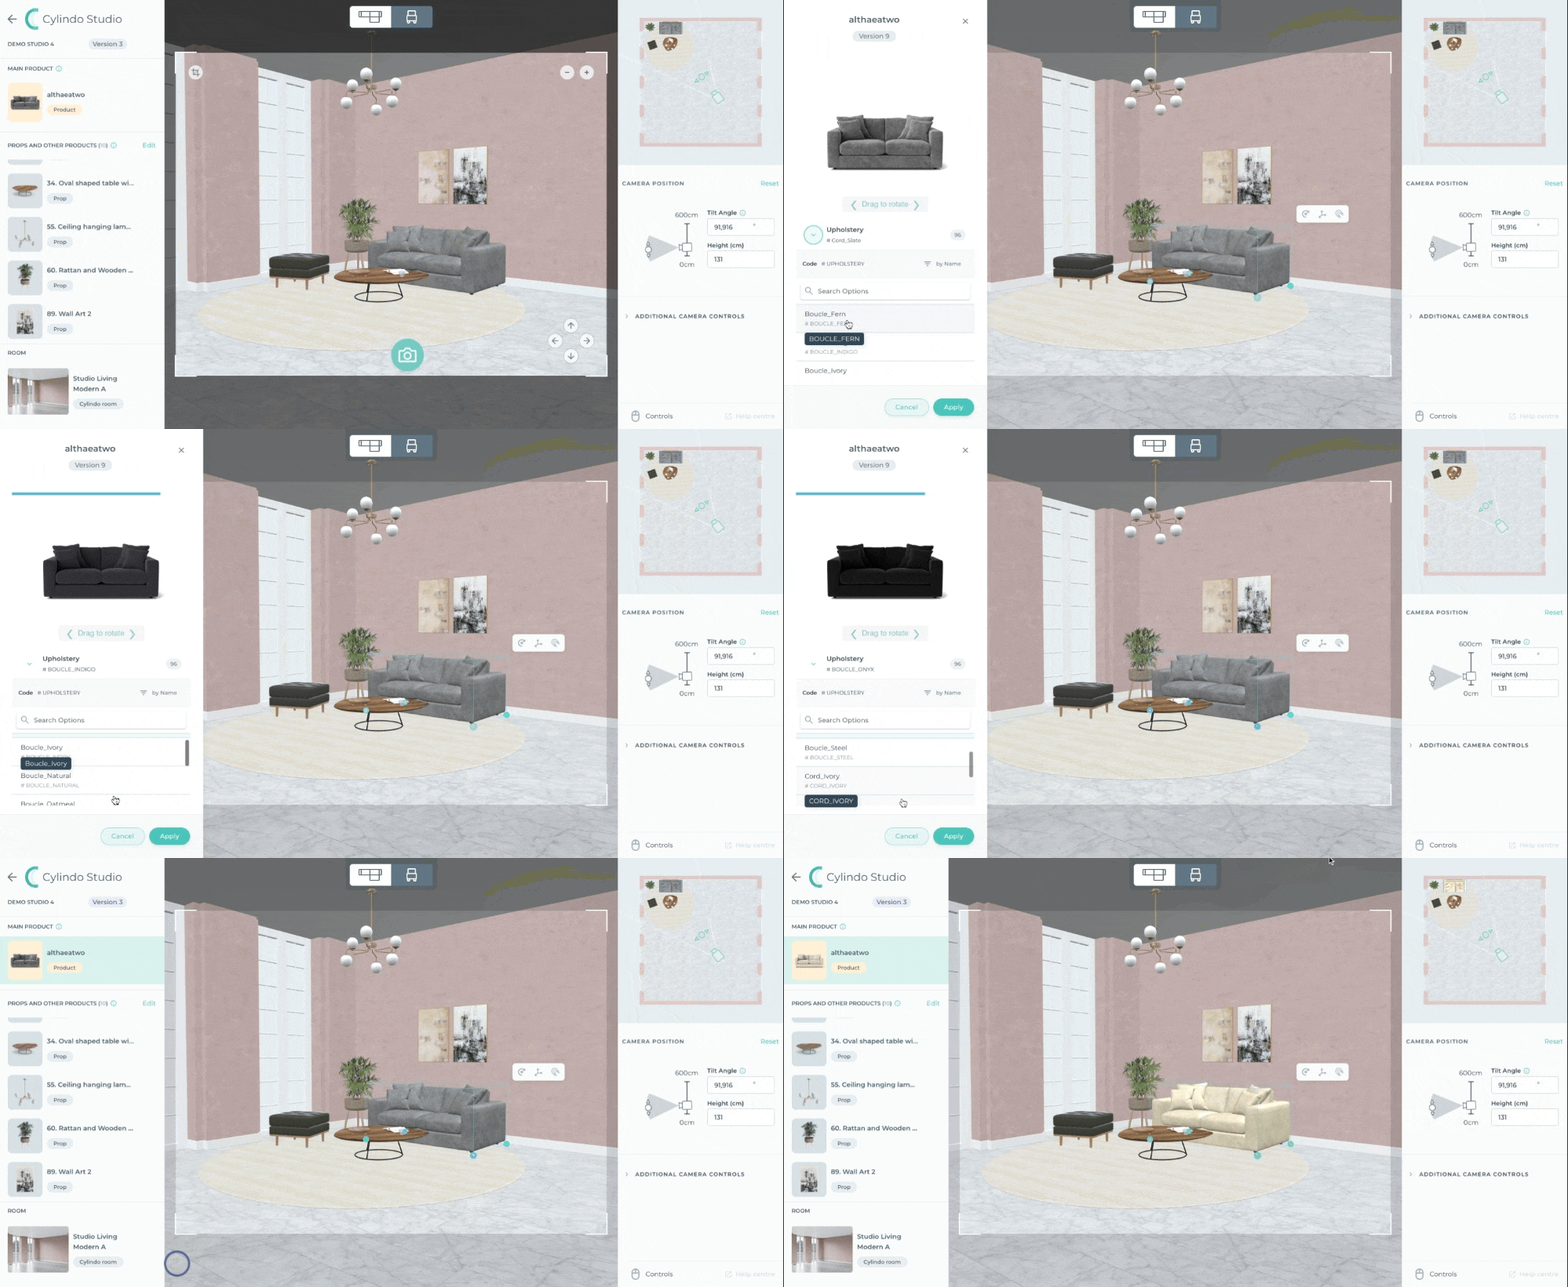
When you create a new Studio you choose a product to be the focus of your composition. You can change its configuration in the main Studio interface by simply clicking on its thumbnail and interacting with the configuration panel.
Missing products in the product selection list
If any of your products do not appear on the product selection list, it can be because one or more conditions are not met:
- the product must be published
- the product should have been created or updated with Product Setup
- the product must have a low poly model that must be enabled
Please reach out to your CS rep if one or more products cannot be selected in Studio.
Main product - product set
If you wish to create a studio with a set of products that needs to share the same configuration logic, a new custom product – featuring multiple products in one – must be created.
This is a common scenario for table-chairs sets in which all the chairs of the set share the same material options.
Please note that the product set layout is determined by the “product set” geometry and cannot be changed in Studio.
Room
Each Studio requires a Room. Rooms consist of one architecture, a set of wall and floor material options, a background and a lighting setup. Rooms in most cases can present different wall and floor material options, selectable both in the Studio creation flow and from the Studio main interface.
Lighting
The lighting setup of each room is neutral and calibrated to accurately represent darker and brighter materials for the same product. This is the same type of light used in the 360 view renders of products, but its intensity and direction is optimized for each room and to the camera angles closest to the one featured in the Room thumbnail.
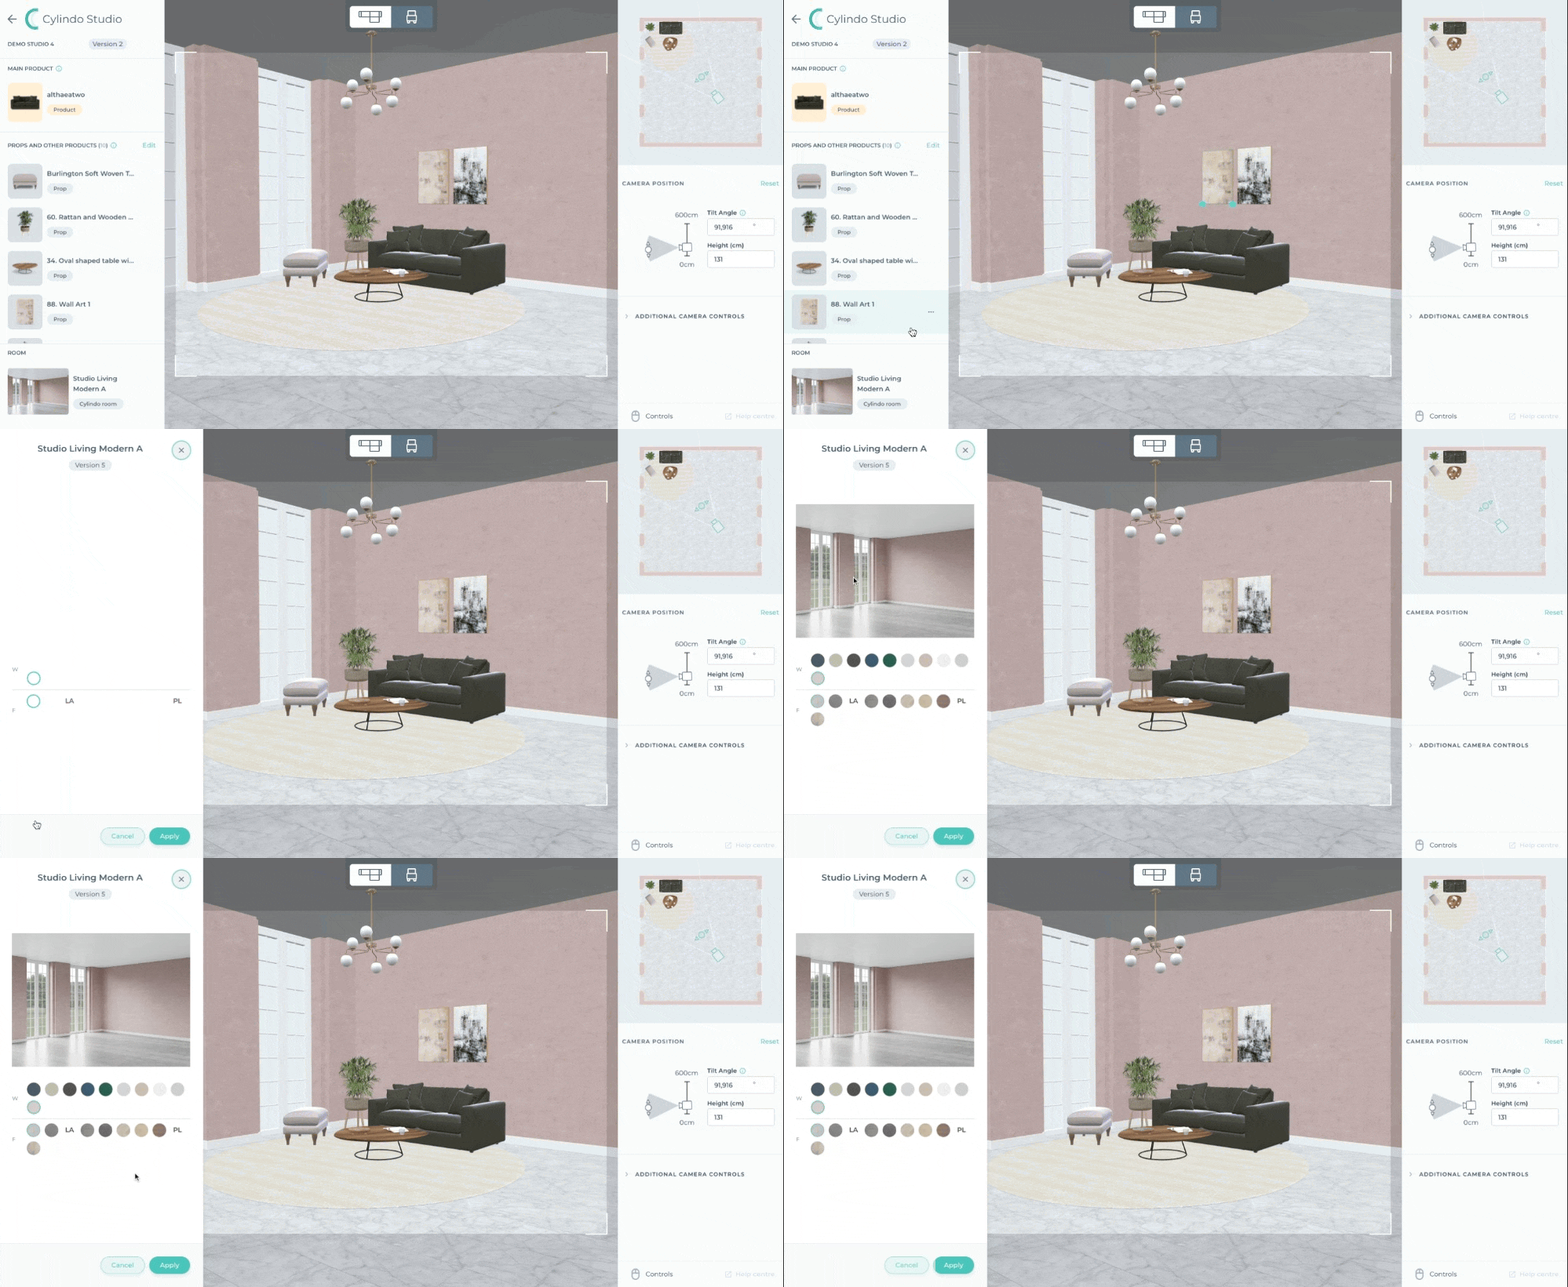
The room preview can be expanded by clicking on the thumbnail.
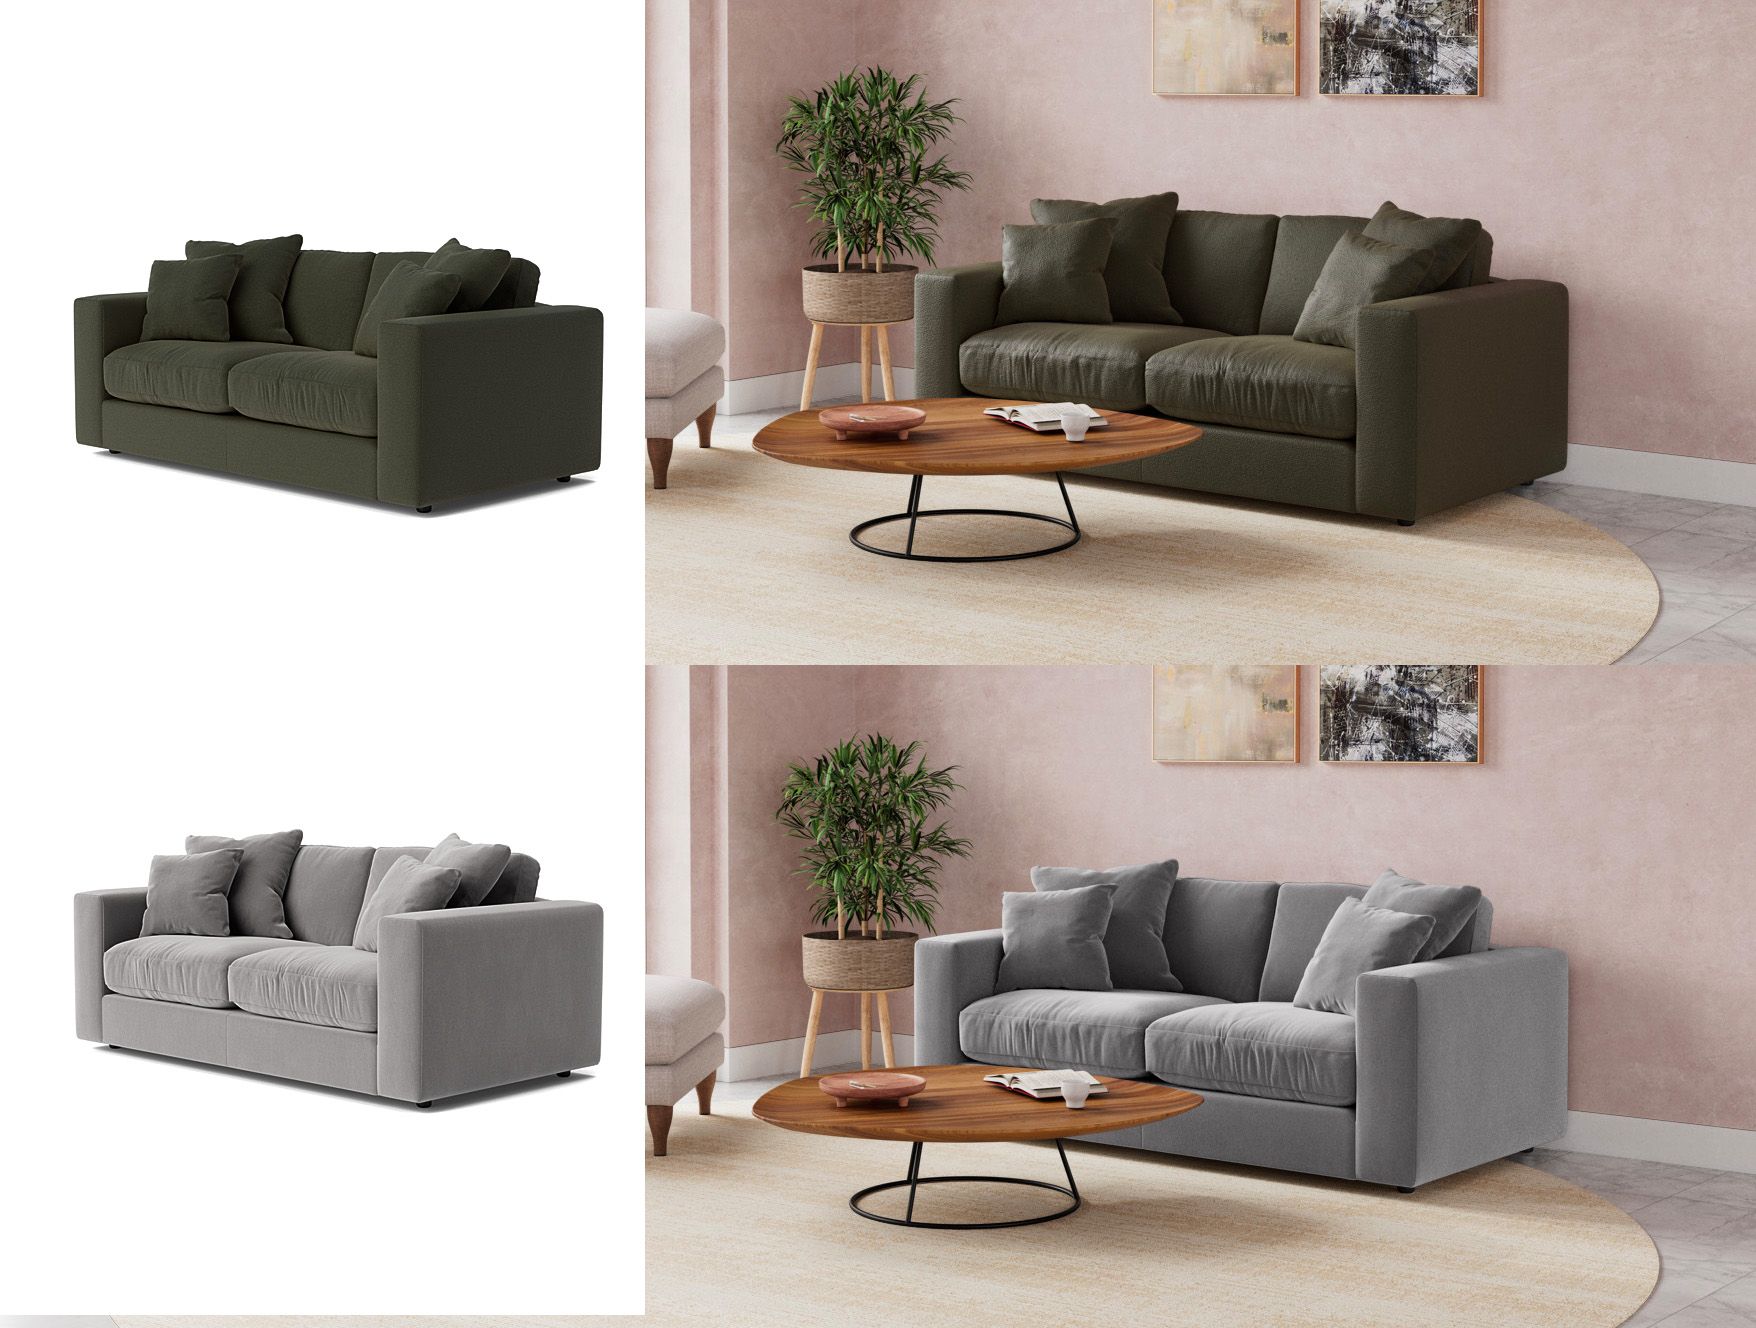
The light is calibrated to achieve consistent results across all the products’ materials.
At the moment Studio does not provide users control over lighting settings through its interface. However, its library of rooms will constantly evolve to provide a variety of mood and light effects.
Moreover, products and props cannot emit light. For example, objects like lamps or chandeliers, although they can present materials that make them look switched on, do not actually affect the lighting in the Studio. Studio will keep evolving its lighting capabilities overtime and it will offer more controls directly from its interface, however, Custom rooms can be created with custom lighting tailored to your needs.
Background
Backgrounds can be seen through the windows of each room. Whether a room is from the Studio library or a Custom room, they have the option of either a uniform white background or a 360° image. The 360° image of each room follows the camera position, therefore the perspective of the background won’t present artificial distorsions. Each image used as a background is optimized to match the exposure set for the specific Room it has been featured on.
Props and additional products
In addition to the main products, you are able to add props or other products as secondary objects within the Room to create an environment that matches your needs. These may be found in the Studio library or can be Custom-created.
Even though all your products can be configured in the Studio interface, the ones added as additional products will be rendered only in the configurations in view. Only the Main product can be rendered in all its features and options.
This is required in order to generate more realistic lighting for the scene.
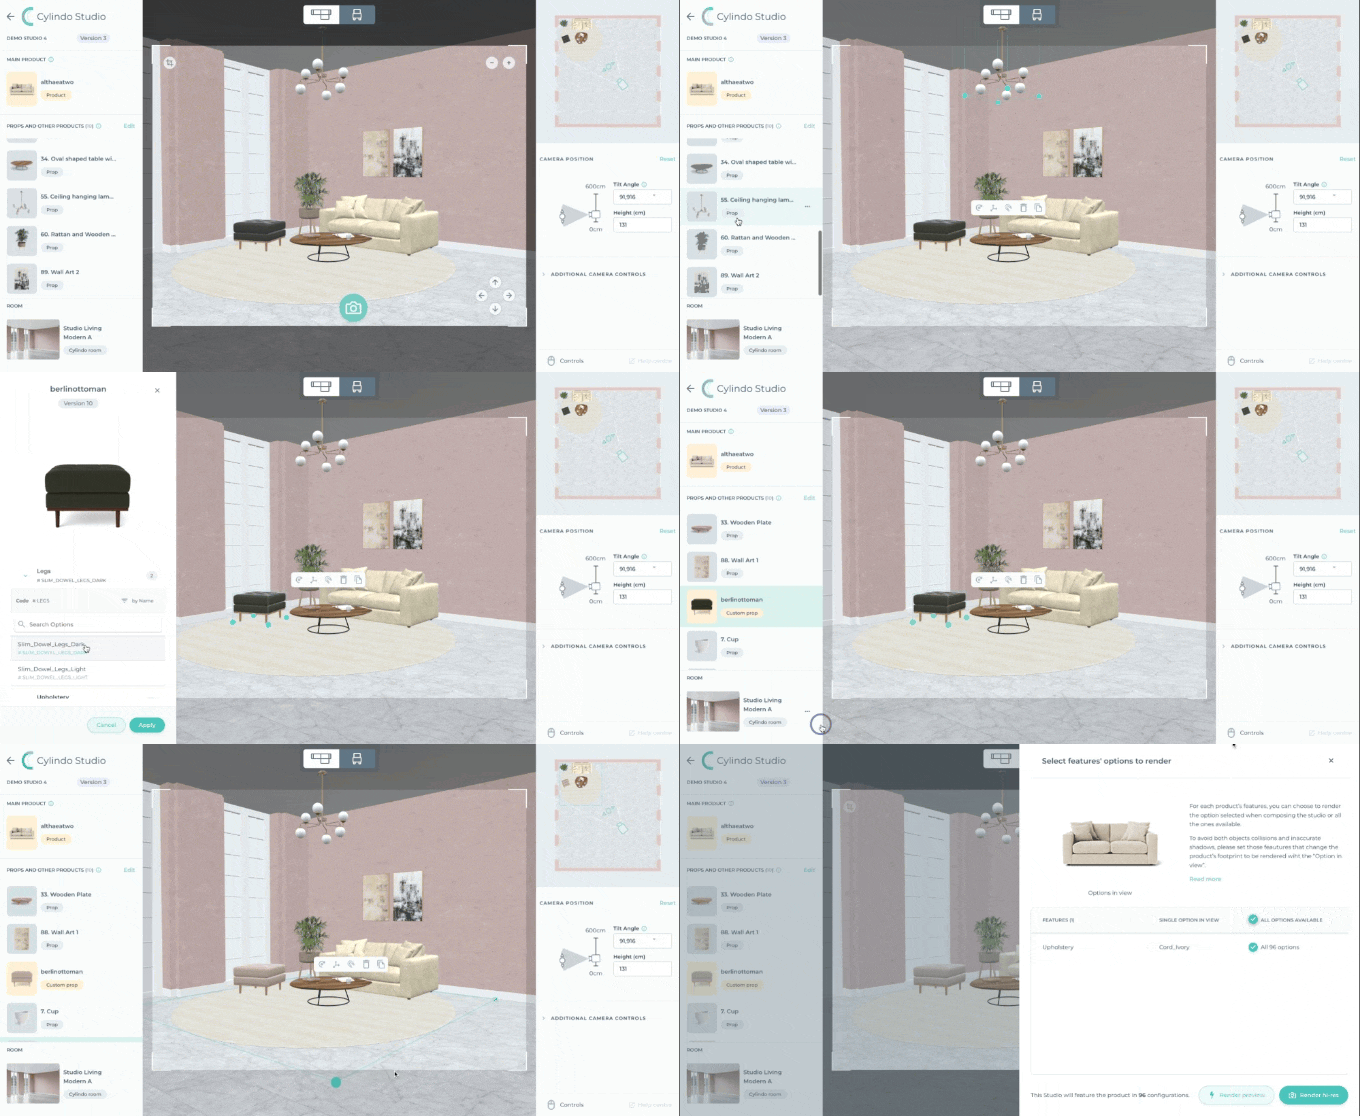
To change the main product or additional products’ configuration simply click on the thumbnails and select the feature you want to change.
Products and props placement
Products and props can be placed freely across the room space. They can be selected and moved from both the camera view and the top view.
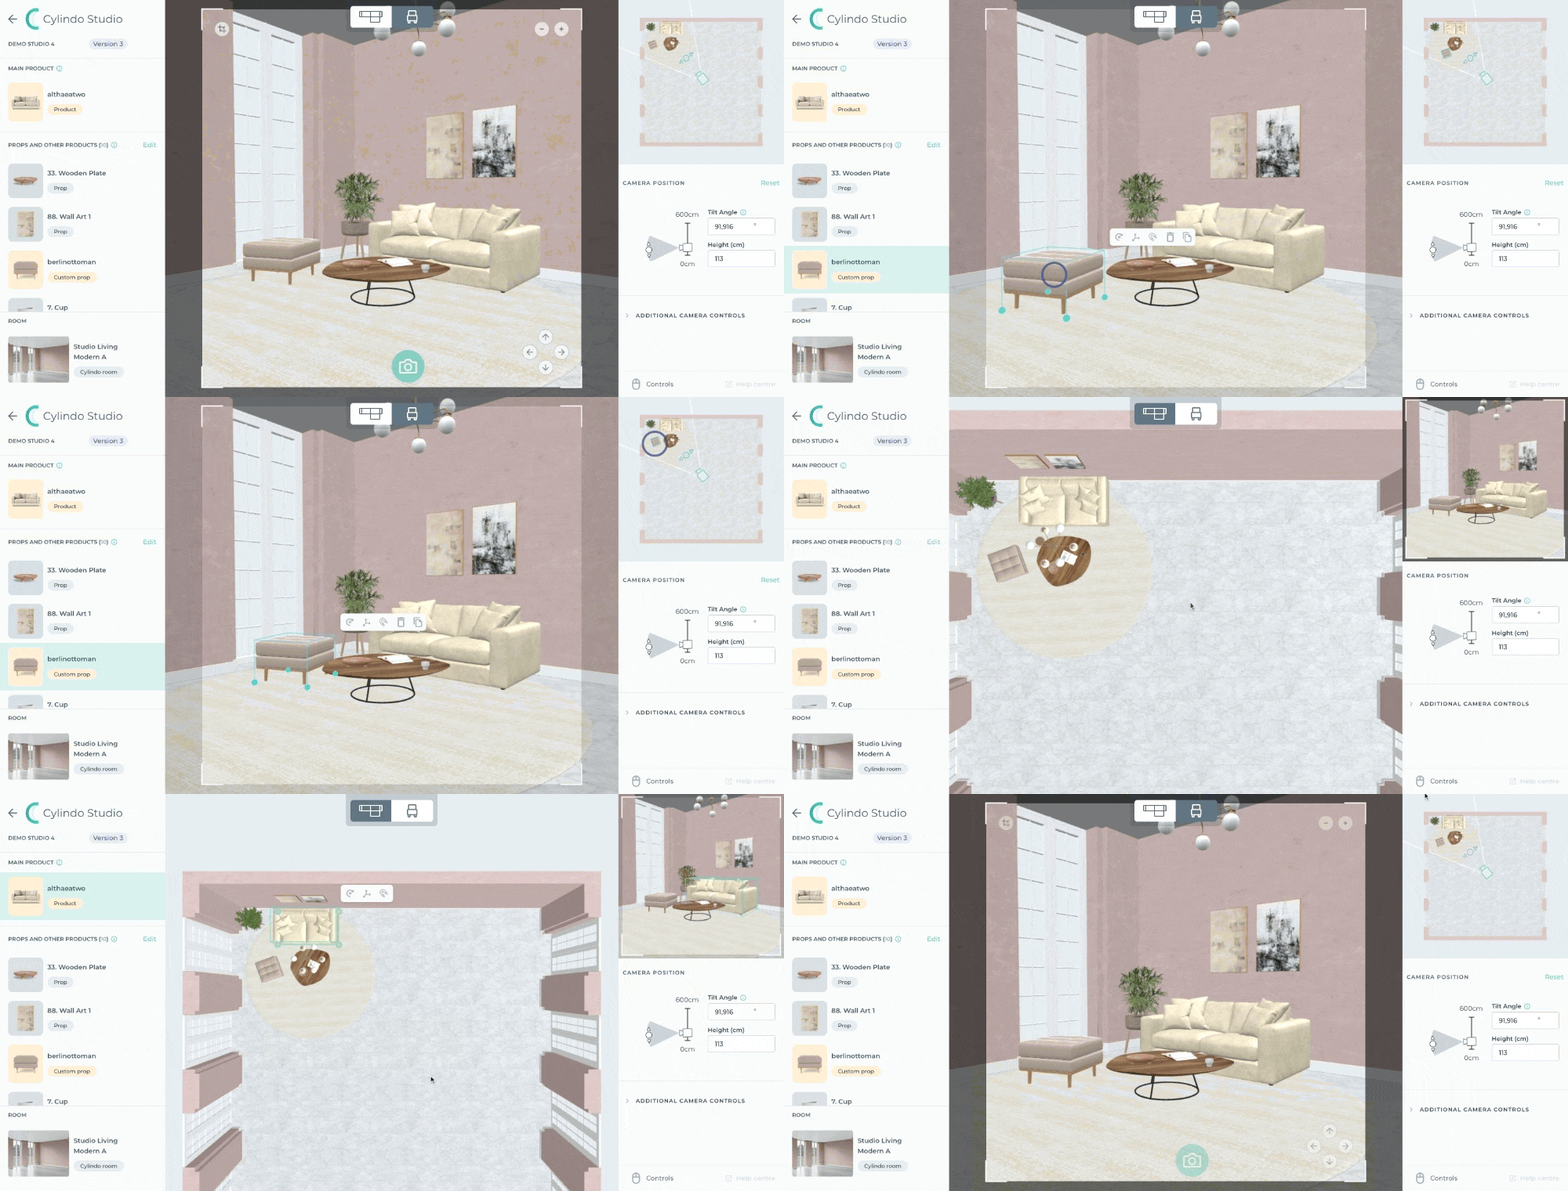
Each product and prop are assigned a surface type which they are then able to automatically snap to when placed in the room.
To activate the auto-snap function, simply select the object and click on the magnet icon.
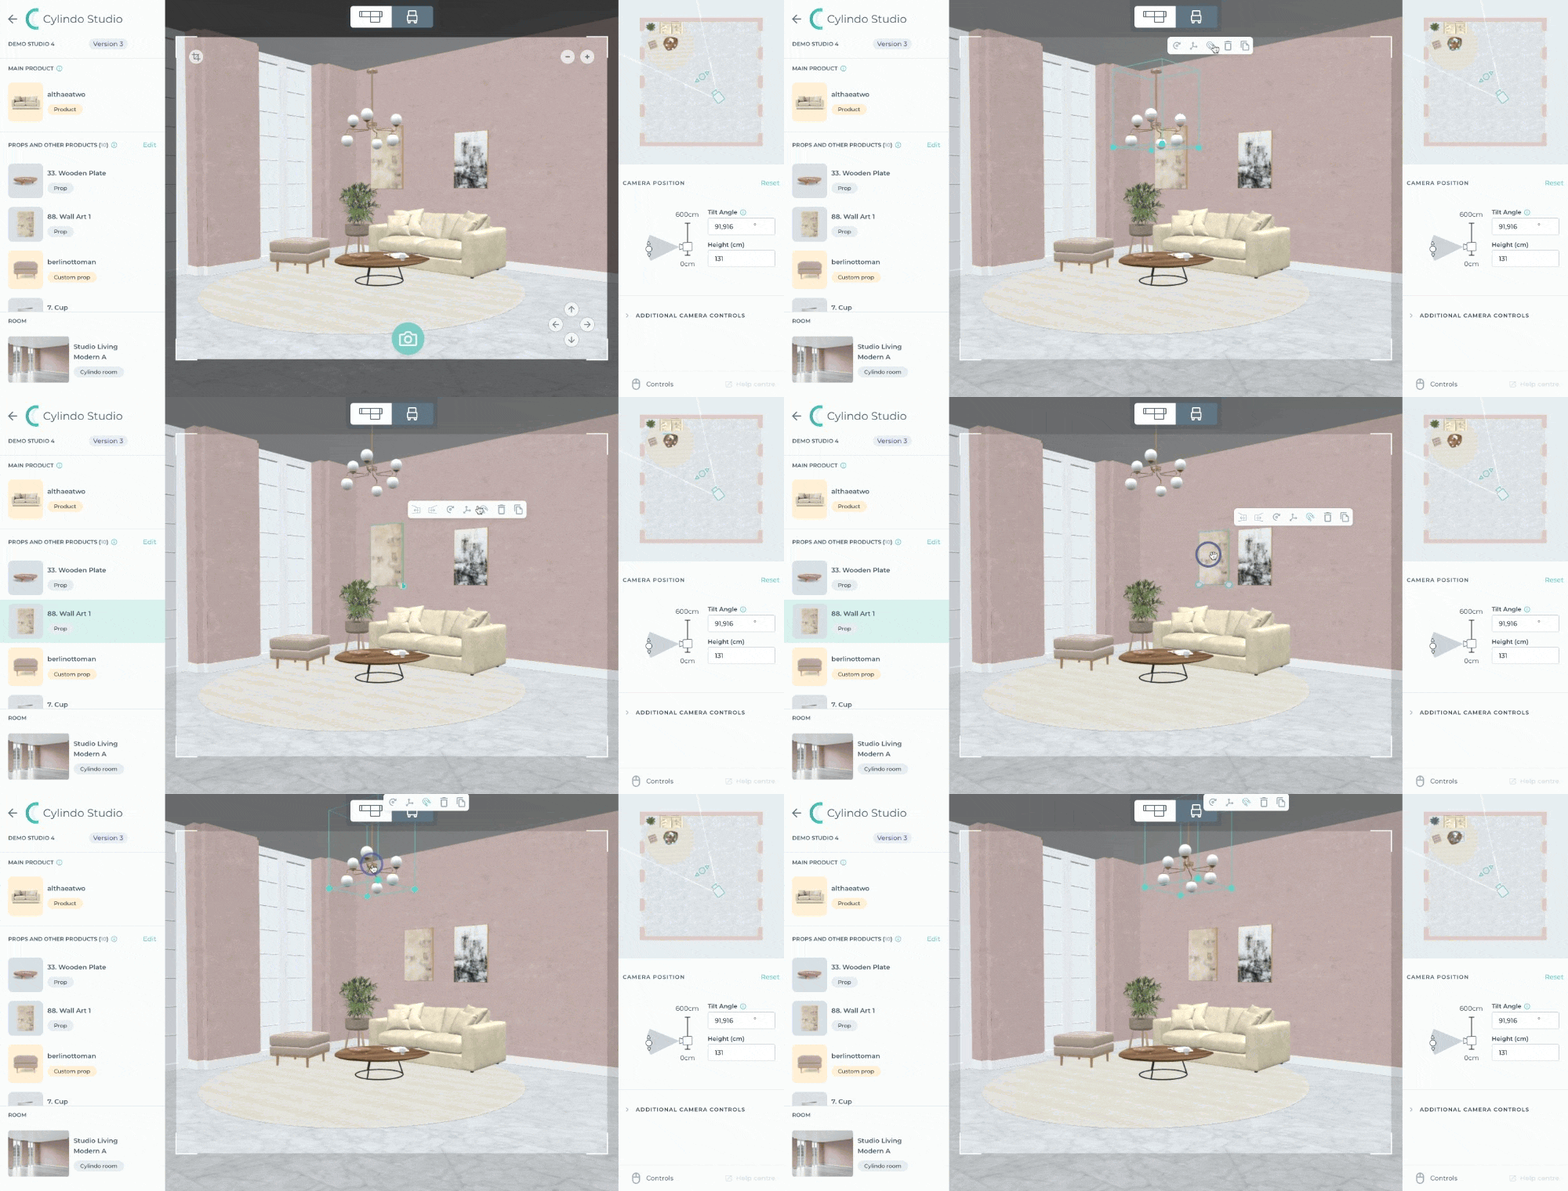
Auto-snap feature in action
For instance, paintings and shelves will snap to walls, lighting fixtures to ceilings, and rugs to floors. Once snapped, the item can be easily dragged across the surface it has been snapped to. By default most of the products and props snap automatically on other horizontal surfaces. For example, a vase will snap to the floor but jump on a coffee table if dragged next to it.
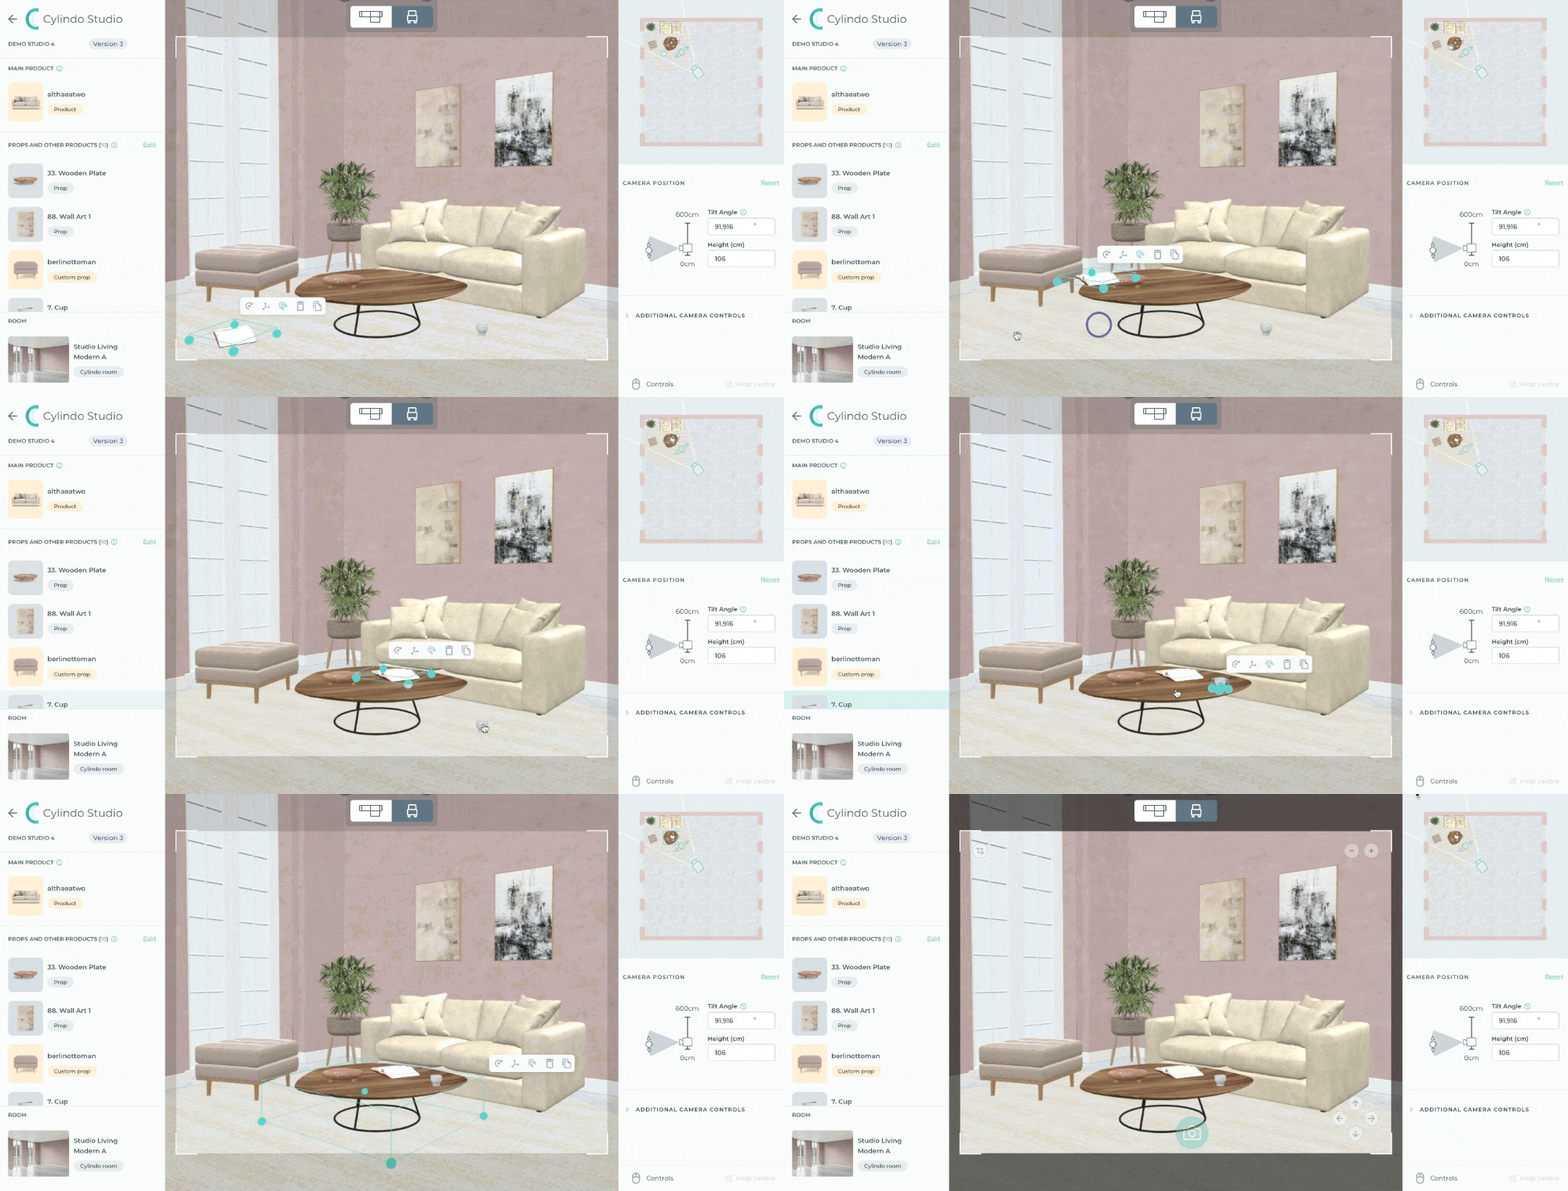
Auto-snap limitations
Please note that the auto-snap functionality works best when both the surface and the product edge touching it are flat. For instance, placing an open book on top of a curved sofa seat might generate unrealistic visuals.
Moreover, items cannot interact and form to the surface they have been placed on. For instance, we advise not to place pillows and blankets on top of products since they will not change shape according to the shape of the surface they have contact with.
If you wish to feature props such as pillows, bed sheets, or blankets on your products, these need to be modeled directly on each individual product.
Free and rotation modes
In case the auto-snap feature does not allow you to easily achieve the shot you are looking for, you can switch to the other positioning modes: Free and Rotation modes.
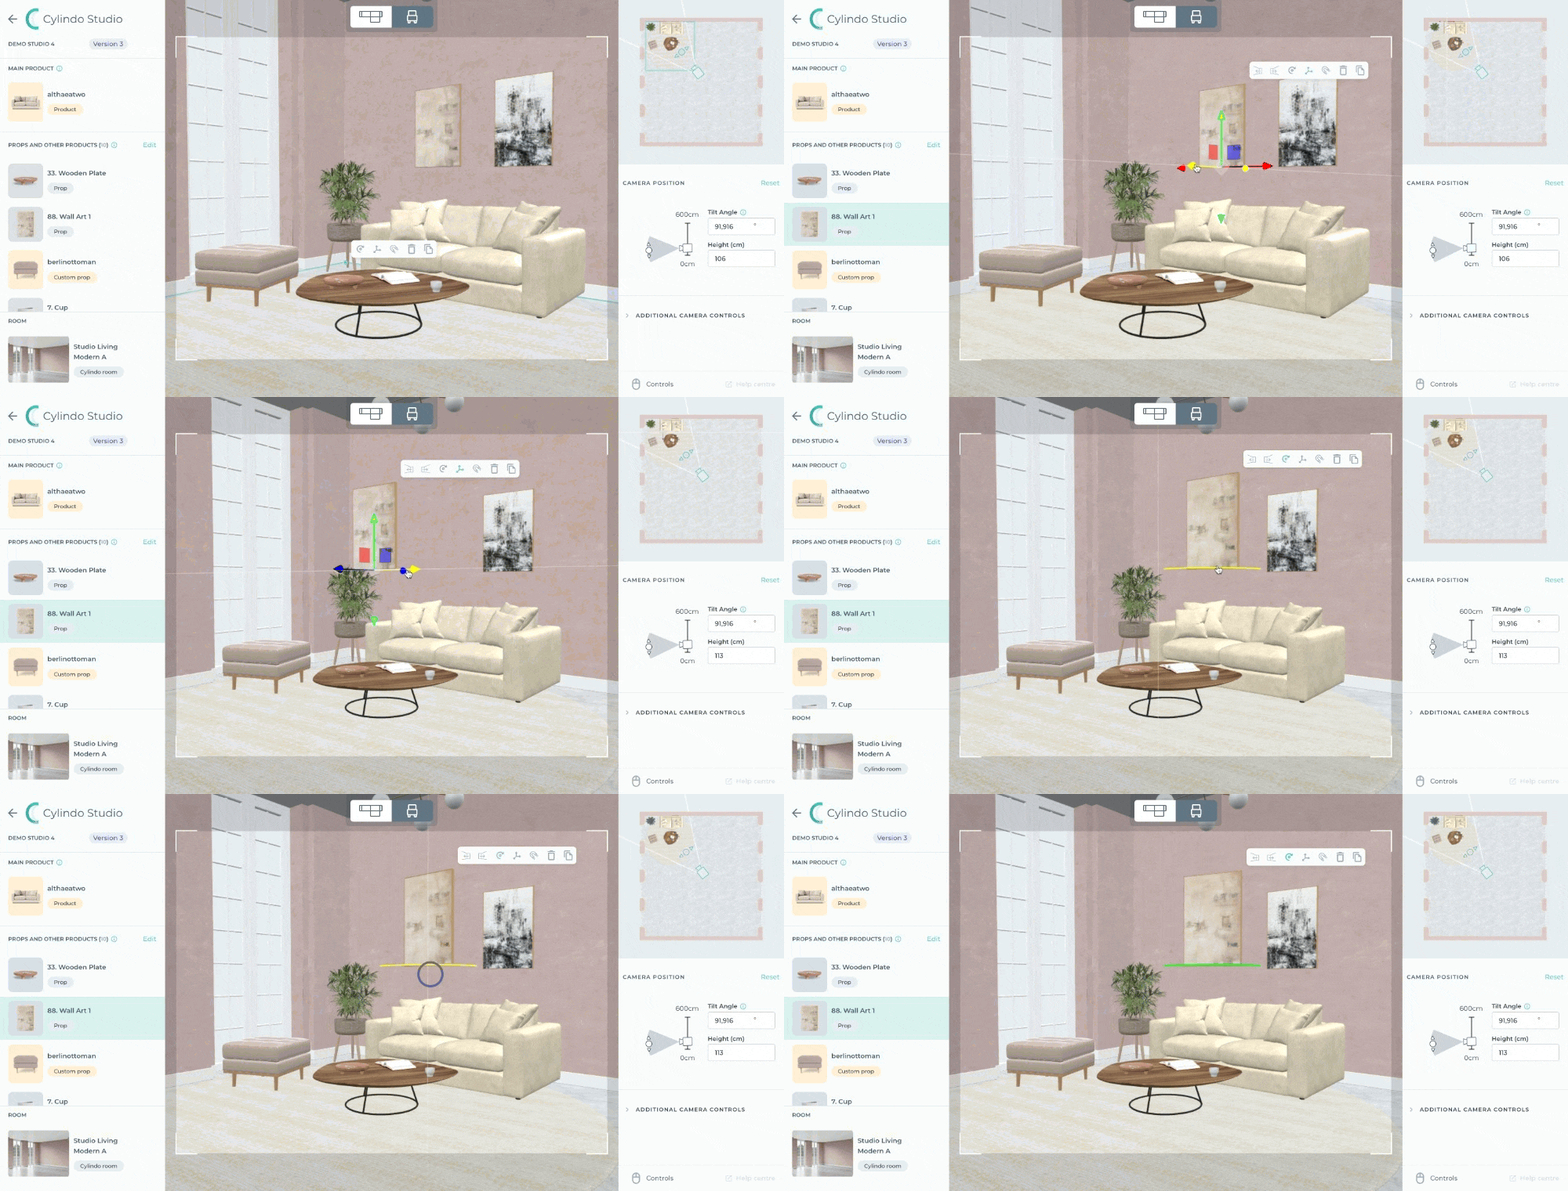
They are accessible from the same contextual menu that appears when the item is selected and they allow placing any item more freely in space.
Studio Render Preview
Where to access the tool
To access Live Preview, open a Studio and then click on the preview button to activate live rendering.
How does it work?
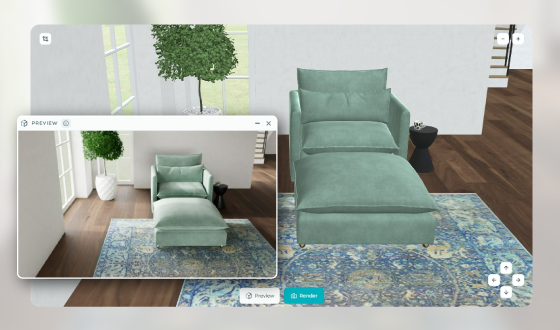
Live preview works by initiating a dedicated server that handles a lightweight render of your Studio. This server loads the 3D scene, including 3D models, materials, light, and camera settings.
The first time a preview window is opened for a Studio, it takes approximately 4 minutes to start the render server and an additional minute to load the scene. Each user is allocated a dedicated render server for their session. The session is terminated after 10 minutes of inactivity..
The preview image is rendered and streamed back to you. Initially, the image contains a significant amount of noise, gradually improving over time.
The preview image is rendered in 1K resolution, maintaining the aspect ratio specified for that Studio.
Step by step:
1. After opening the Studio, find the "Preview" option located on the bottom center of the Studio workspace and click the button to open up the live preview window, then wait for your preview render to load.
2. The live preview server renders your Studio scene in real time. That means it starts with a grainy image that gradually becomes less noisy over time. While the image renders, the preview screen will show some static.
3. Once the noise is cleared, you can move the preview window by clicking and holding on the title bar. You can also adjust the window size by clicking and the bottom right corner of the window.
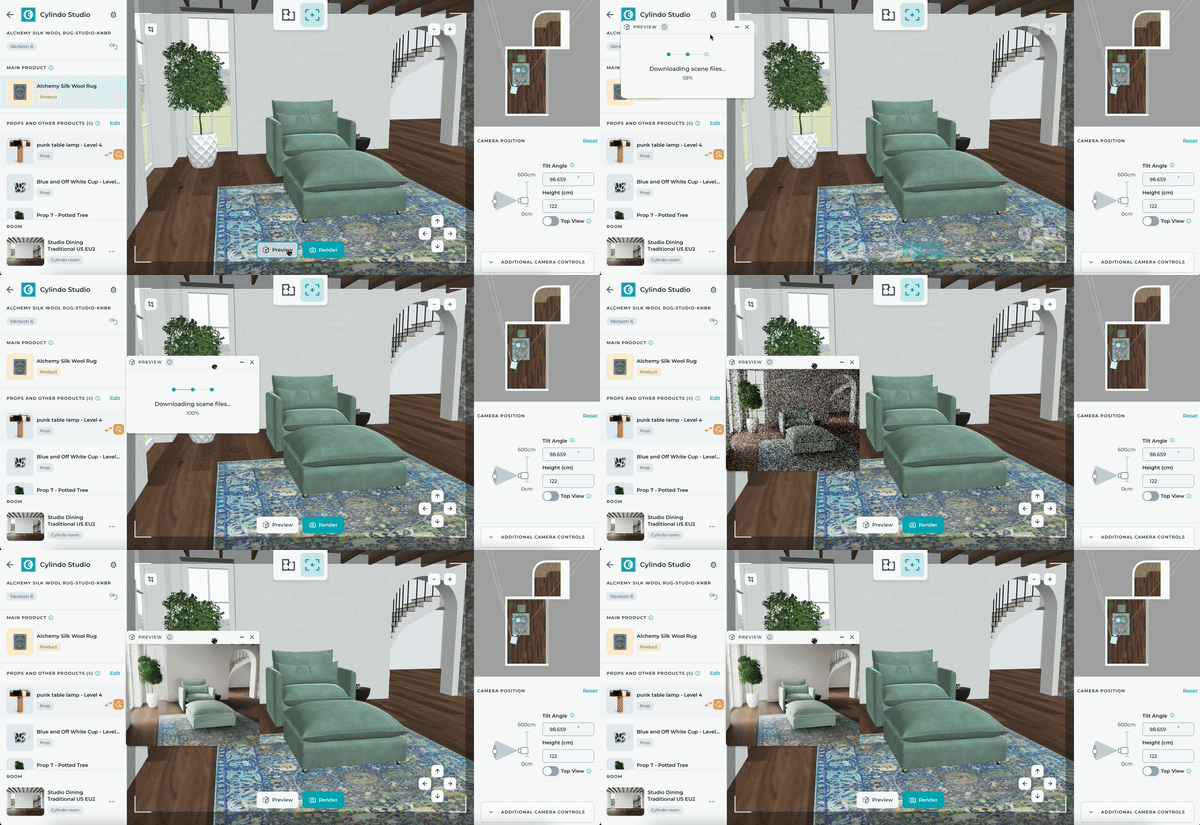
4. Once your preview window is open and set, all changes made to your Studio will be mirrored in the preview window. Updates may take a few seconds to appear.
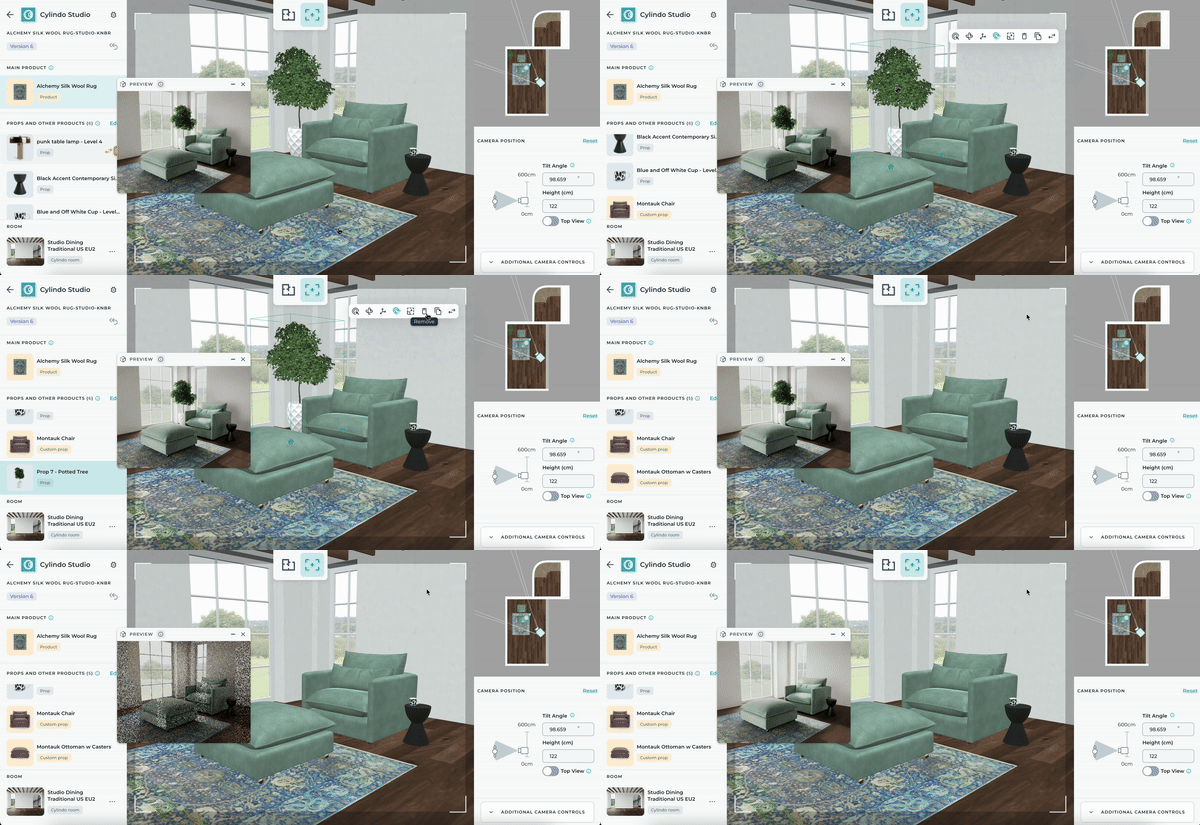
5. To hide the preview window, simply click on the minimize icon located at the top right corner of the preview. Doing so will keep you connected to the render server and avoid the need to queue again for a render server.
6. To end the preview and disconnect from the render server, close the window by clicking the "x" icon.
Additional notes:
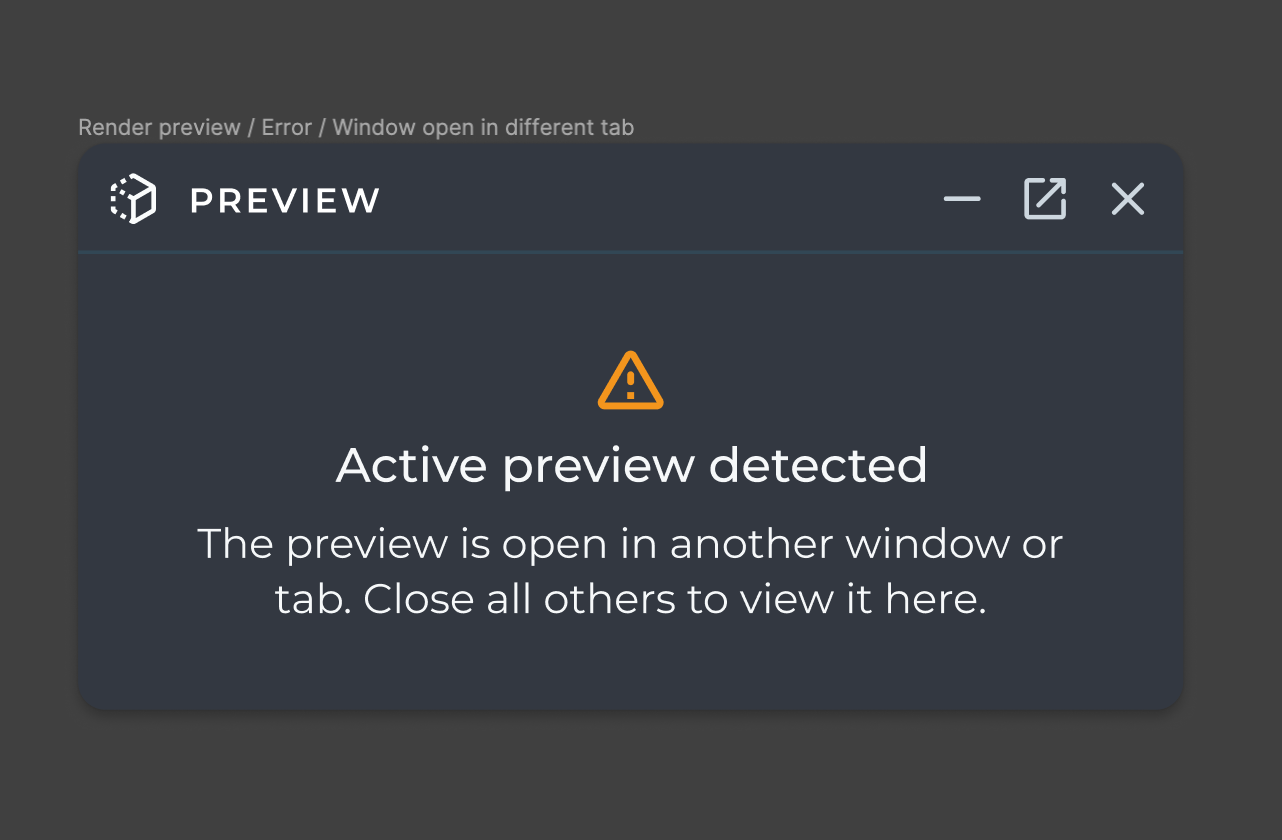
1. Multiple active preview windows aren't supported at the moment. If the preview window is open in one or more web browser tabs or windows, it will pause until the other windows are closed.
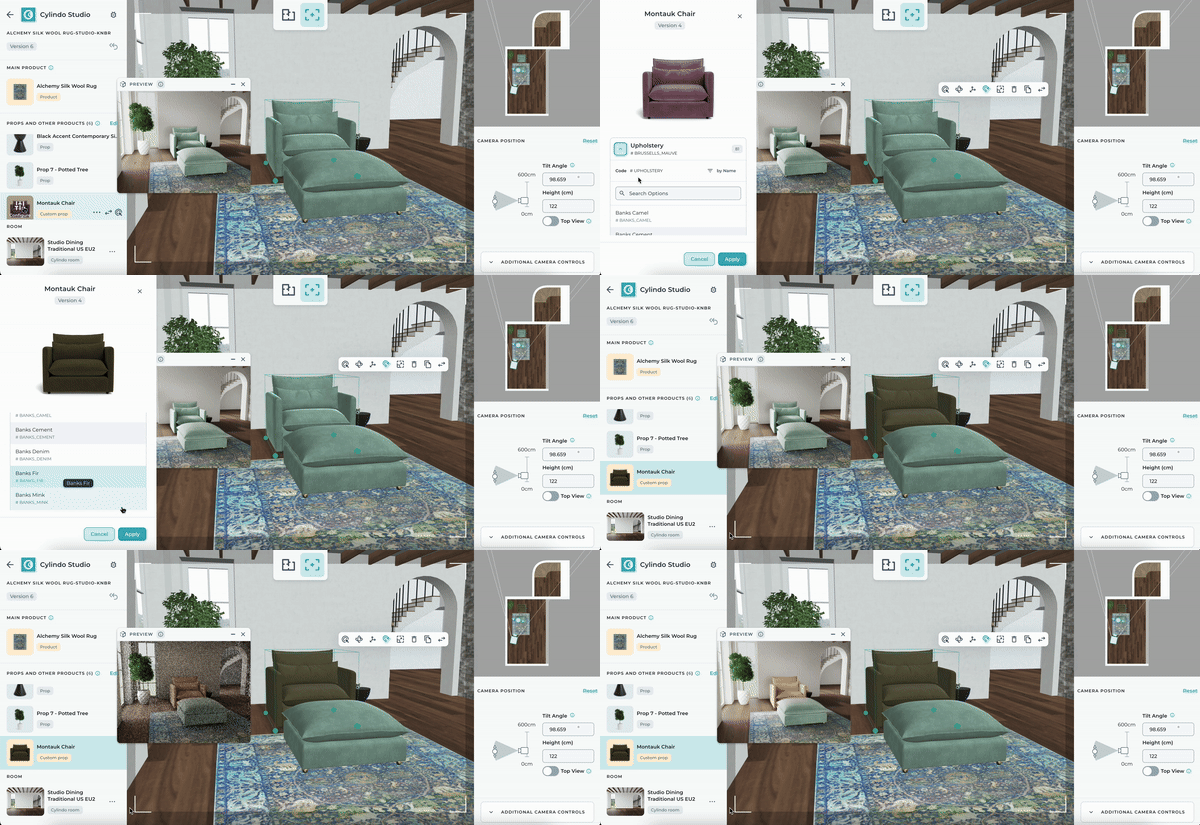
2. Currently, products with color corrected materials are not supported. As a result, they may display a misleading visual representation in the preview window. These will show appropriately in the final render.
Was this helpful?
Still need help? Ask the team